
While it may not seem like it, there’s technically limited storage space available to internet users.
There are only so many hard drives and only so much media, and while the amount available is incomprehensibly vast, the amount any one person can access is comparatively tiny.
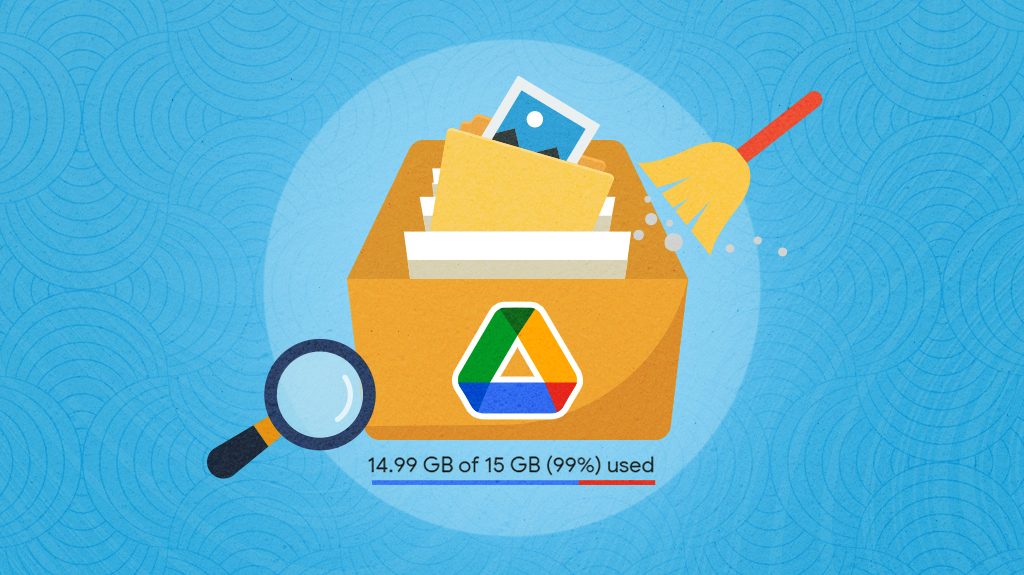
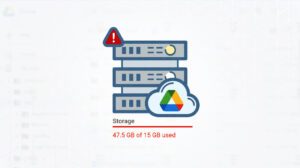
Take, for example, your Google Drive. Cloud storage is indispensable for everything from remote work to archiving important data to storing and sharing family photos. There’s just one problem: you’re limited in how much space you have. You only have 15 GB of space by default, and while you can get more through various options, it’s still limited.
There are plenty of ways to use your storage better, but one of the most important is treating it as a finite resource. You must routinely clean up, organize, and audit your stored files and ensure you’re only saving the stuff that needs to be kept. You’d be surprised at how much junk adds up over time and how much space is taken up by things you don’t need. How can you go through your Google Drive and clean, organize, and audit its contents? As Google Drive experts, we have 15 tips for you.
![]() Note: Before you begin, you may want to ensure there’s nothing business-critical tied to some element of your Drive account. Some business apps, for example, might rely on a specific file structure that otherwise looks messy. You may want to clean it up, but if you do, it could break that app’s functionality. This note shouldn’t concern personal users without any authorized apps or software.
Note: Before you begin, you may want to ensure there’s nothing business-critical tied to some element of your Drive account. Some business apps, for example, might rely on a specific file structure that otherwise looks messy. You may want to clean it up, but if you do, it could break that app’s functionality. This note shouldn’t concern personal users without any authorized apps or software.
1: Use Filerev
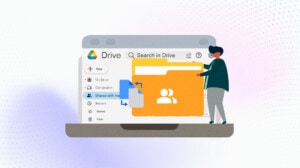
You can do some searching, sorting, organizing, analyzing, or categorizing you want to do with files in your Google Drive manually. However, doing so requires specific knowledge of how the internals of Google’s systems work and takes time and effort to manage. These cleanup and organization features also have their limits. So, why not use an app to do all that for you?
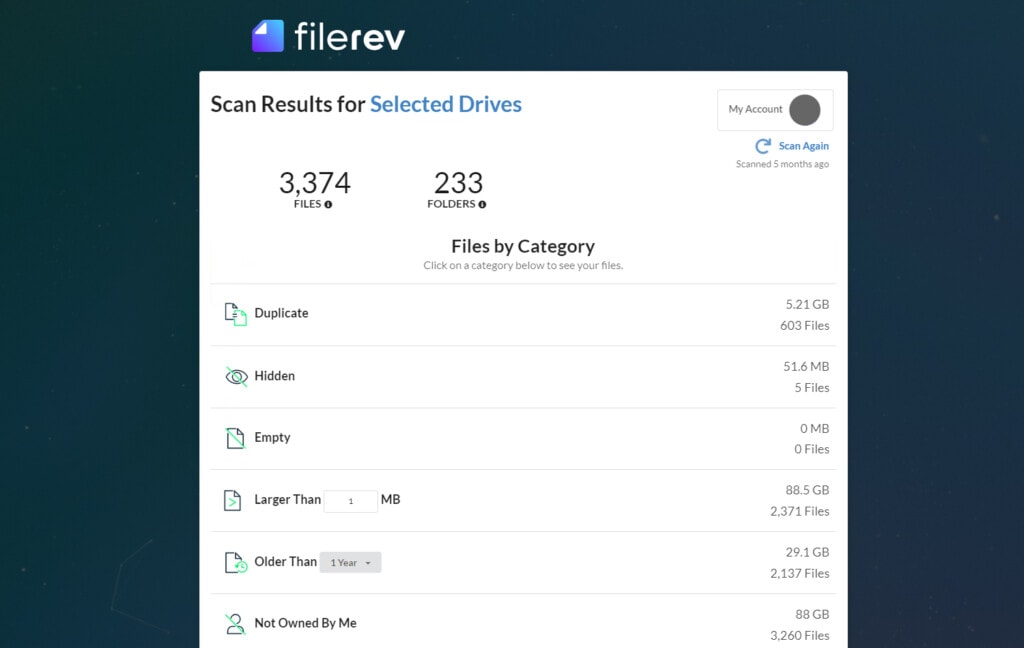
Filerev is an app that helps you analyze and organize your Google Drive account. Everything on this list can be done much more quickly through Filerev than through manual searching and tweaking.
We make it easy to clean, organize, and optimize your Google Drive space.
If you’re interested, all you need to do is click here to authorize the app to access your Drive, after which it can audit, categorize, and present all the data you could need to organize and clean up your Drive.
2: Consider a New Folder Structure
Before you get deep into the weeds with your Google Drive sorting, you might want to decide on a new folder structure for sorting and managing your Drive. Google Drive is simply storage space; you can create as many folders and sub-folders as you want. Folders don’t take up space, after all.
The only caveat is that a folder in a shared drive only allows up to 20 nested folders; you can’t have more than 20 layers to the Drive/folder/folder/folder etc., structure.
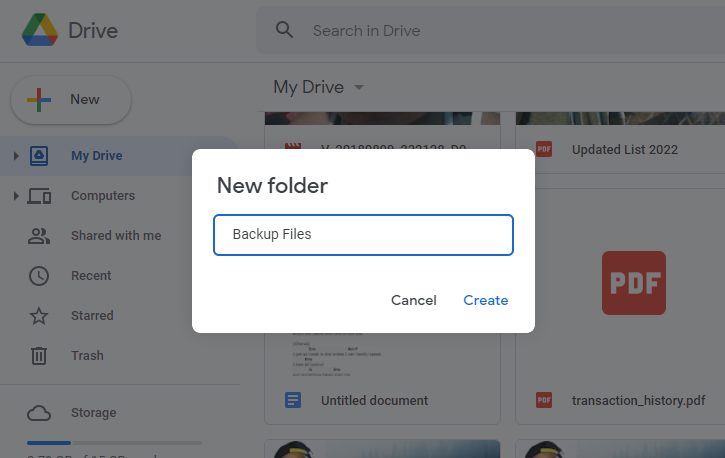
Consider what you’re using Drive for – do you routinely add, remove, access, and edit files? Is it primarily used as a backup? Different folder structures can reflect different types of usage. Moving everything to new folders can also ensure that you go through everything in your Drive, rather than a partial sort that can leave more trouble behind than when you started.
3: Name and Rename Files to Make Sense
How many of the files in your Drive have sensible names? One of the most common culprits is photographs. When you take a picture with a phone or even a digital camera, they often have file names like IMG_XXXX, or DSCN####, or PXL_####, or what have you. These are sensible enough as far as unique names, prefixed by the kind of device that took the image, but they aren’t very descriptive.

You can rename your photos by describing when and where you took them and sort them accordingly. DSCN########.jpg is pretty terrible, but “Grand_Canyon_Trip_2022_1.jpg” is a lot more descriptive.
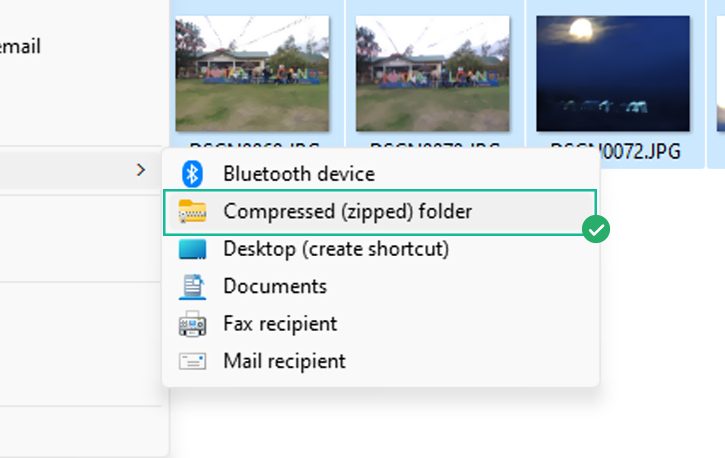
![]() Pro tip: If you select multiple image files at once, right-click the first one, click “rename,” and type the name, they will all be named the same with a sequential number added.
Pro tip: If you select multiple image files at once, right-click the first one, click “rename,” and type the name, they will all be named the same with a sequential number added.
Three DSCN#### files will become “Grand_Canyon (1)“, “Grand_Canyon (2)“, and “Grand_Canyon (3)” sequentially. It makes it easier to bulk-rename files, keeping them in the same order!
4: Sort Files as You Clean
Incremental sorting of your files can be much easier than going through everything all at once after you’ve already done other processing. For each file, decide what it should be named, where you should sort it, and if it needs to stay on the Drive or if you can move it somewhere else. Groups of files can be sorted at once.
This technique is a good tip if you only have a few hundred or a few thousand files to sort. If your Drive is nearly-full, old, and active, you may need a more automatic solution for sorting and categorization. That’s one excellent feature you get through Filerev, too.
5: Sort by Size
When dealing with a Google Drive with almost no available storage space, one of the fastest ways to free up space is to look for the biggest files. Unfortunately, if you have a lot of nested folders and files scattered throughout your Drive, it can be hard to identify the largest files.
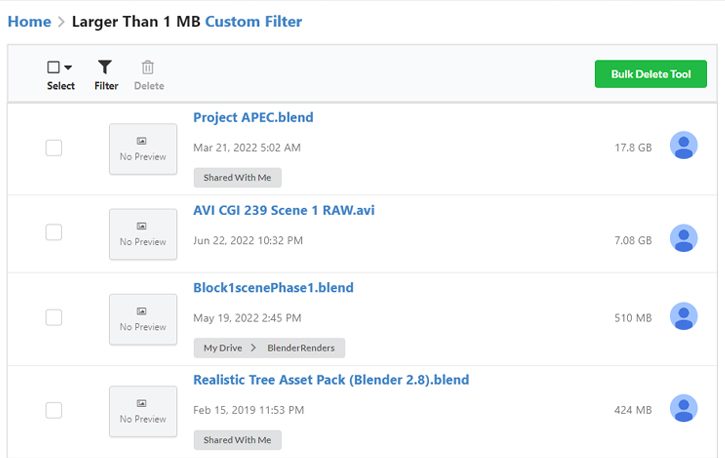
Luckily, you have many different options to find the biggest files.
- Use Filerev to sort, categorize, and show you the largest files.
- Click on your Storage meter and sort by size to see your largest files.
- Sort folders by size and drill down.
You can read about all of these options and more in this guide.
6: Purge or Compress Huge Files
Once you’ve identified the largest files on your Drive, you need to figure out what to do with them.
Generally, you have a few options, depending on the file and if it needs to be accessible.
- Delete the file. Huge files that are duplicates or no longer necessary can be deleted as long as it’s either backed up elsewhere, outdated and unnecessary, or simply obsolete.
- Compress the file. First, download the files that you want to compress. Then, using a zip application, you can compress your files into a zip file, making those files take up much less space while still being available to unzip and use if necessary. Upload the compressed version and then delete the original file.
- Resize the file. For images, in particular, you can often compress a large image into a smaller one without losing quality. There are many ways to do this, such as TinyPNG.
Once you’ve handled your largest files, you’ll have more space to work with and notice a slight boost in your available storage space.
7: Delete Broken or Unneeded Recovery Files
Many programs create hidden files to use as backup and recovery files. For example, Microsoft Office programs have an autosave feature that will periodically make a hidden file with a name that resembles the original file name, preceded with a ~ and named as a .tmp or a software-specific name.
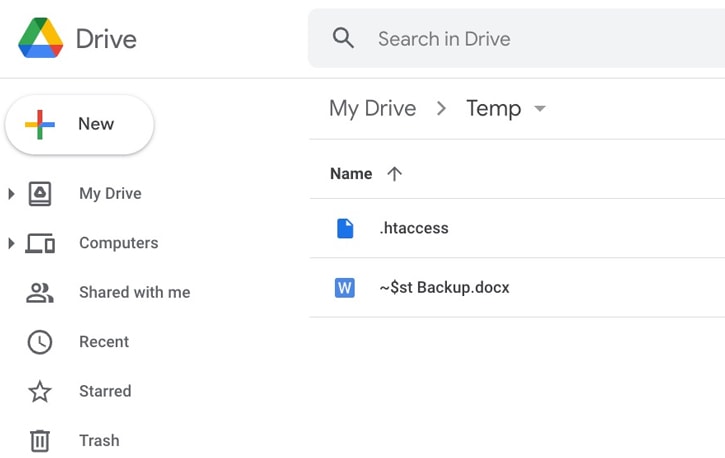
Most of the time, these files are removed when the original document is saved – at least, they are supposed to be deleted. Most of the time, you can delete them with no issues. Sometimes, though, they aren’t deleted and can take up space. Since they’re hidden files, you’ll need some way to view hidden files (like the setting in Windows or MacOS), and then you’ll need to decide what to do with them.
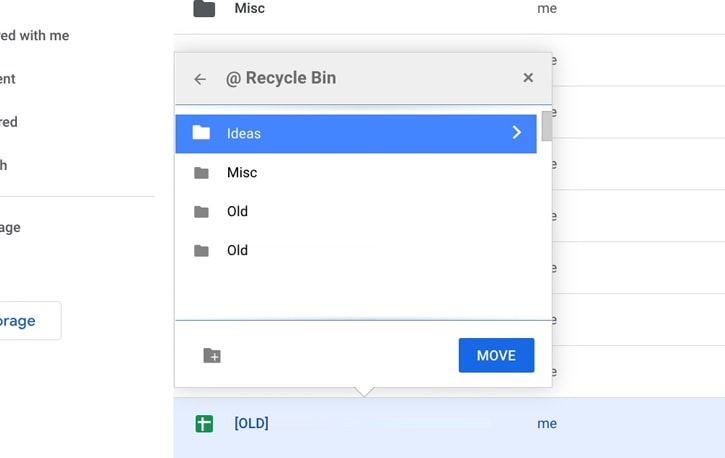
8: Identify and Remove Duplicate Files
For some time, there has been confusion about how Google Drive handles multiple copies of the same file.
Many thought that Google was changing its system such that when the same file is in multiple locations, one would be the “canon” location, and others would be made into shortcuts.
![]() Note: It turns out this isn’t true. You can read more about it here.
Note: It turns out this isn’t true. You can read more about it here.
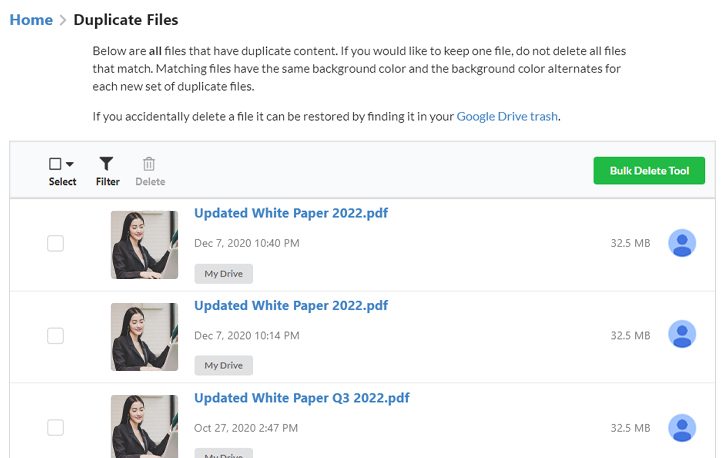
At the same time, this means you can have duplicates of the same file taking up space throughout your Drive. If you want to purge these, you’ll need to find them, which can be tricky and time-consuming.
You can look for files with “copy of” in their name, but that doesn’t tell you if the original still exists. Depending on your duplicate files, you’ll also have to perform this step hundreds or even thousands of times.
We recommend using Filerev to identify and show you duplicates quickly and easily.
Lastly, it’s common to be left with a ton of empty folders after removing your duplicate files. If this happens to you, you can read our guide on how to remove these empty folders.
9. Find and Remove Old Files
We all have old files in our Google Drive accounts; some are over a decade old, and we no longer need them, or they can be archived, compressed, or moved.
Using a tool like Filerev, you can find old files in your Google Drive account by searching for those older than a specific date. For example, if files created before 2017 aren’t likely to still be helpful to you, you can choose that date, run a search, and quickly delete any files that you no longer need.
You can also do this natively. For example, to search for files that haven’t been modified since 2017, you can use a search parameter like this: before:2018-01-01
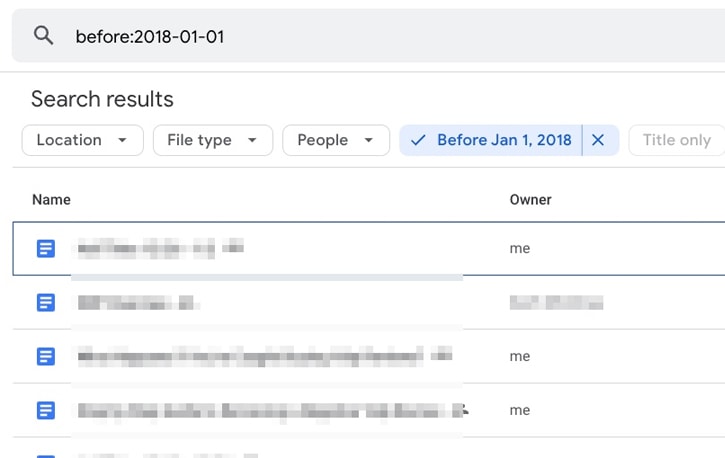
The only downside to this option is it can list hundreds of thousands of files, depending on the size and age of your Google Drive account. The cleanup process can take quite a long time to perform manually, so if you have a lot of files in your account, using an app like Filerev will be much quicker and more efficient.
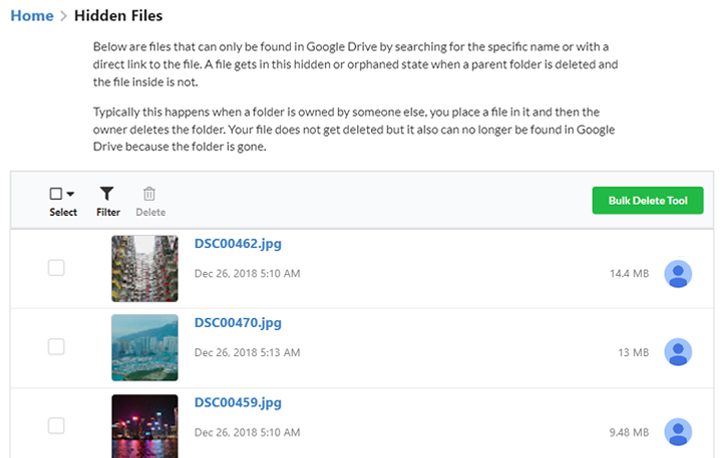
Hidden files can add up in Google Drive quickly. We’ve already covered recovery files, and we’ll talk about app data in a moment, but hidden files can also include other data, including your trash! In addition to using Filerev, you can also search in your Drive for files with labels like “in:trash” to see what might be floating around there.
Periodically emptying your trash can increase your storage space. It’s worth mentioning that while items in your trash still count towards your storage quota, Google won’t sync those files to your devices.
11: Remove Unused App Data
App data is hidden by default, so you can have a lot of space in your Drive taken up by files you can’t see or access. For example, if you use an Android device tied to your Google account, Google may store app data from the apps you install in your Google Drive account. Any app that you give permission to Google drive can store data in a location that is only accessible by the app.
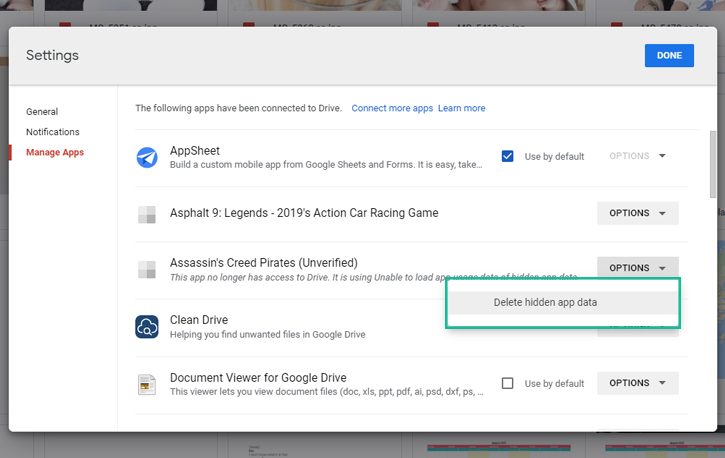
Luckily, it’s easy to access if you know how. To delete your unused app data:
- Log into drive.google.com.
- Click on Settings.
- Click Manage Apps on the left.
- Identify apps that have data stored in your Drive, and choose to delete them if you don’t want them.
Through this, you can clear out a surprising amount of space taken up by apps you no longer use.
12: Clear Old Email Attachments
Google Drive isn’t the only source of files taking up space. The storage limit is attached to your Google Account, not just your Drive.
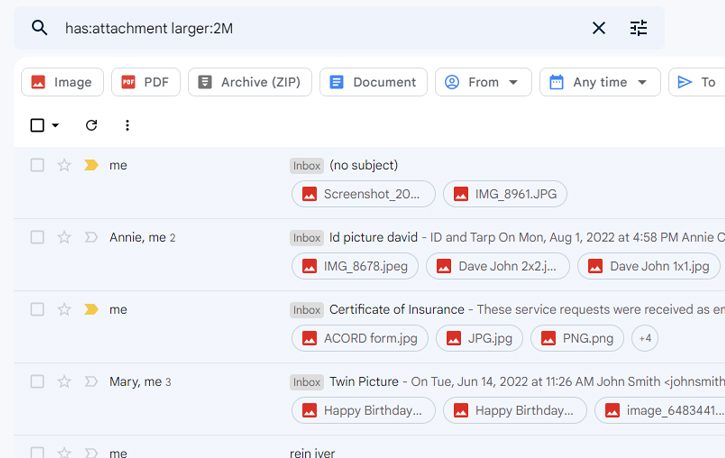
One of the biggest space-hogging culprits is often your Gmail account – if you use Gmail, emails with attachments also take up space.
To find files taking up space, log into Gmail. You can run searches such as “has:attachment” or a refined search with “has:attachment larger:2M” for larger files. You can also find everything in spam or trash with is:spam or is:trash, and delete those files to free up some extra space.
13: Use Color Coding for Drive Folders
While most of the tips on this list have been about freeing up space, you can also do some simple organization through Google Drive. For example, did you know you can color-code your folders in Google Drive?
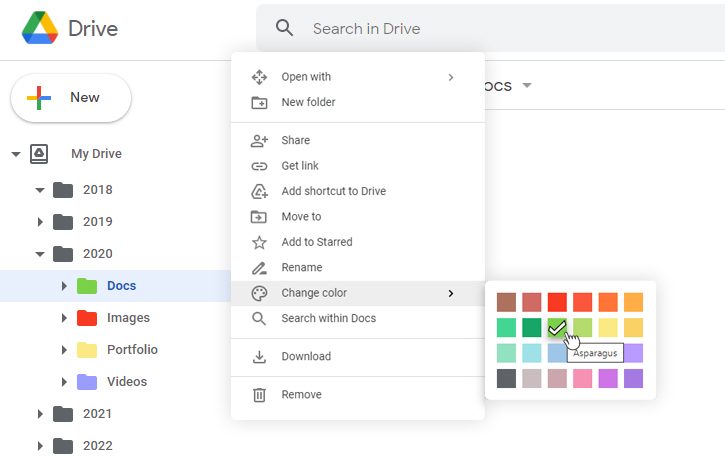
All you need to do is log into the web-based platform, right-click on a folder, and choose “Change color.”
![]() Note: Unfortunately, this only works when you browse your Drive from the web. Your folder icons on your computer won’t change.
Note: Unfortunately, this only works when you browse your Drive from the web. Your folder icons on your computer won’t change.
14: Don’t Worry (Too Much) About Non-Owned Files
One thing that might be concerning is a ton of files in your Drive that you don’t own. You can’t delete the originals because they aren’t yours, but will it eat up your file space if you decide to keep your copy? Luckily, the answer is no. Every file that has been shared with you is available in your Drive if the owner hasn’t removed the file or your access to it.
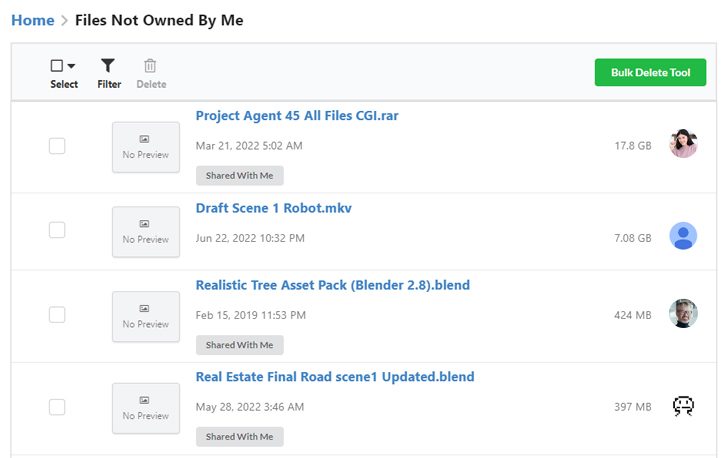
However, they don’t take up space in your Drive, just in the Drive of the original owner. The only worry you might have is the organization of those shortcuts, which you can move around as much as you like.
![]() Note: If you have “Editor” permissions for these files, you can safely remove them from your account without deleting the owner’s copy. If you have “Viewer” permissions, you cannot remove these shared files from your account, but they do not count towards your storage limits.
Note: If you have “Editor” permissions for these files, you can safely remove them from your account without deleting the owner’s copy. If you have “Viewer” permissions, you cannot remove these shared files from your account, but they do not count towards your storage limits.
15: Upload Photos to Google Photos
Here’s another organizational tip: if you have a lot of photos in Google Drive, you can move them to Google Photos instead. It’s easy to do and makes viewing the non-photo files in your Drive account much simpler.
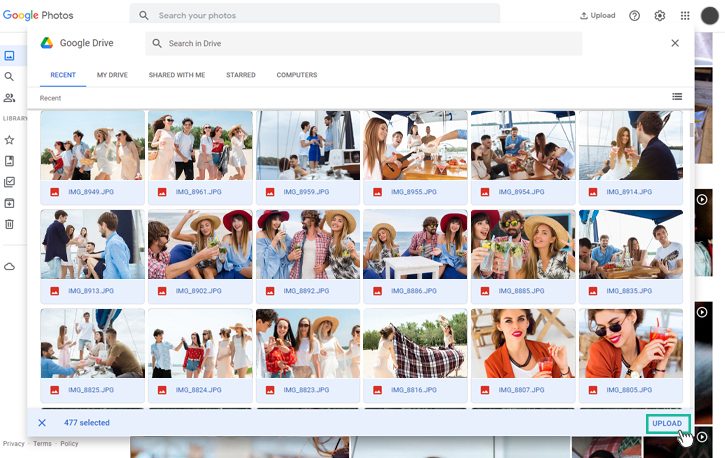
There are two caveats here.
First, any file moved to Google Photos will still be present on Drive, so you need to delete the copy in Drive; otherwise, both versions will take up space.
The second is that both Drive and Photos use your Account Storage, so you don’t save any space doing this. So why do it? For organizational purposes.
![]() Note: It’s worth mentioning that there are no solutions to remove duplicate files in Google Photos. For this reason, some users might decide to move their photos to Google Drive to organize their files, folder structure, and sharing.
Note: It’s worth mentioning that there are no solutions to remove duplicate files in Google Photos. For this reason, some users might decide to move their photos to Google Drive to organize their files, folder structure, and sharing.
16: Use Another Backup Option
It’s a “last resort” option, but Google Drive can offload some of the work to other storage options. You can put your data on media like a USB storage device, an external SSD, or even another cloud storage system like OneDrive or Dropbox.
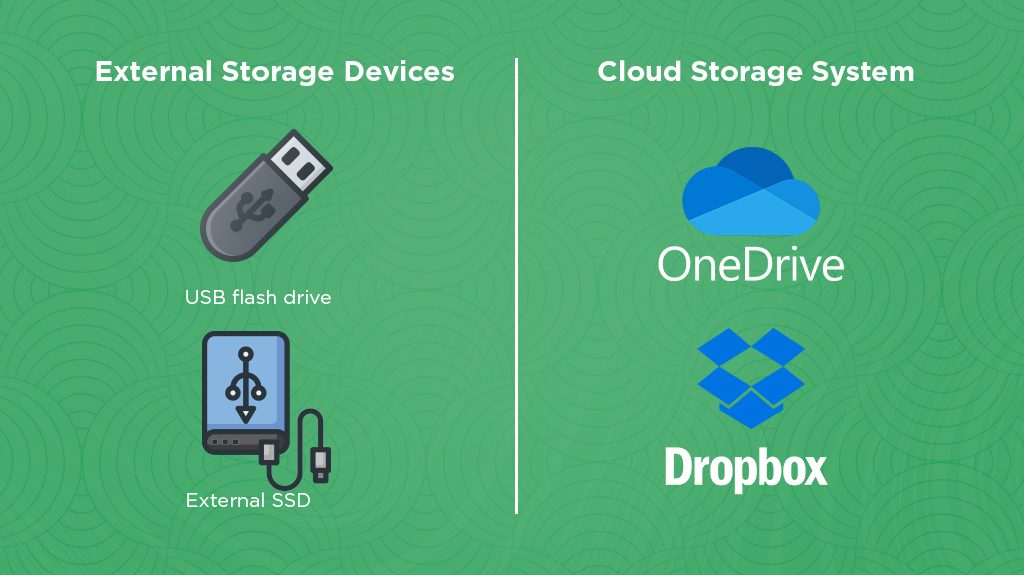
Unfortunately, this can make it harder to find files when you need them, so you need to know where you put what or use alternative methods just for backups. Still, it can save a lot of space on your Drive if you move files you need but don’t actively use to other locations.
Now I turn to you. What is your favorite tip for organizing your Google Drive account? Did we leave any out? Please share with us in the comments section! I’d love to hear from you, and sharing as a group and starting a conversation will help everyone.
Related Posts
 Powerful Tool to See Your Google Drive Folder Size
 How to Delete Empty Folders in Google Drive
 File Size Limits: What is The Max Upload Size on Google Drive?
 FAQ: What Happens When Your Google Drive Storage is Full?
 How to Copy ‘Shared With Me’ Files Between Google Drives
 How to Reduce Google Drive Storage and Organize Your Files
Leave a Reply