
Apple is often regarded as an isolated ecosystem of apps, with minimal cross-over with PC programs. The reason is due, in part, to Apple creating their own versions of many popular features offered by PC companies. Apple even offers cloud storage through its iCloud system.
However, iCloud isn’t necessarily the best option for cloud storage on macOS. For one thing, they only give you 5 GB of storage space with their free plan.
While you can certainly pay for upgraded storage, many people first want to look for other free storage options or to take advantage of Google’s excellent collaboration tools.
One such option is Google Drive.
Google gives everyone with a Google account 15 GB of storage for free. Like iCloud, you can upgrade Drive to get more storage space. Pricing is the same; 200 GB on both costs $3 per month.
That said, whether you want a paid or free plan, Google Drive offers three times as much storage as the basic free iCloud account, and all you need to do is set it up on your Mac.
While you can always access your Google Drive account from the web, you may want to treat it as if it’s just another drive on your computer. You can do so on a Mac reasonably quickly, so here’s a step-by-step guide to setting it up!
Step 1: Register a Google Account
You’ll first need to register a Google account if you don’t already have one.
![]() Note: If you already have a Google account, ensure that you’re signed in before skipping to the next step.
Note: If you already have a Google account, ensure that you’re signed in before skipping to the next step.
There are a thousand different ways to access this page, but the easiest for our purposes is to visit the Google Drive homepage. Once there, you can click the “Sign up at no cost” link, and choose whether you want a business or a personal account.
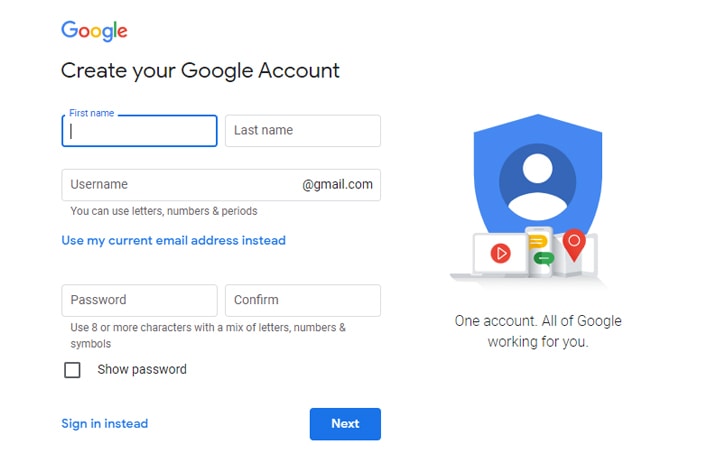
You will be asked for basic information to configure your account and set you up with Google services. In particular, this account gives you access to everything from calendars to Gmail to Drive, all with shared storage. If all you want is Drive, that’s fine; just know that the one account also works for all of the other Google services. You’ll also want to remember the account name because you will use it for sharing files and other Drive services.
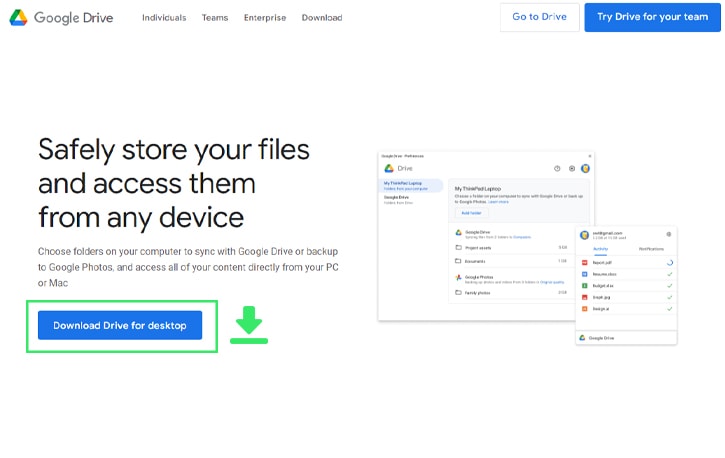
Step 2: Download the Drive Installer
To add Google Drive to the Mac Finder, you must install it as an app. Luckily, this is relatively easy to do in MacOS.
First, you’ll want to click this link to the Google Drive Download Page. Google should auto-detect your system, and the download link should provide you with the .dmg file native to macOS.
Note that if you would like to download Drive for your iPhone or iPad, you can do that by finding the Drive app on the Apple App Store here.
![]() Note: The Google Drive application is named “Google Drive” now. This name change is a recent update as of mid-2022. Formerly, the application was known as Backup & Sync. The name has changed, but the functionality remains the same.
Note: The Google Drive application is named “Google Drive” now. This name change is a recent update as of mid-2022. Formerly, the application was known as Backup & Sync. The name has changed, but the functionality remains the same.
Step 3: Install Google Drive
Once you have downloaded the GoogleDrive.DMG file, you need to locate it in your Mac’s downloads folder. If you download it to another location on your Mac, you’ll need to find it there instead. Wherever you decide to download the file, locate it and run it.
After opening the DMG file, a new window will open up with a file called GoogleDrive.pkg.
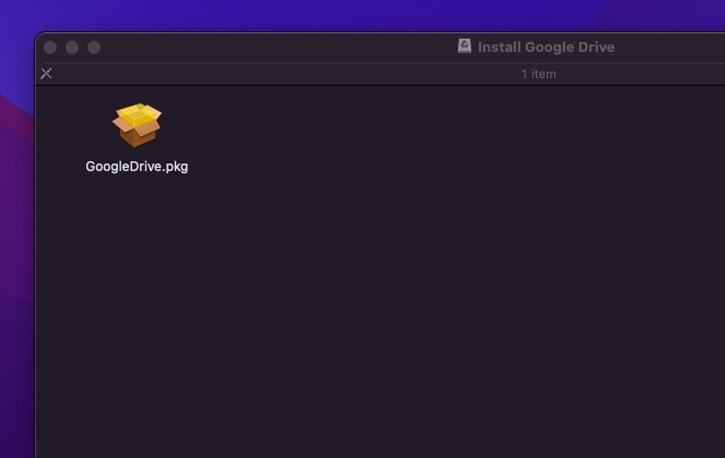
Double click this to start the installation. The installation requires around 406 MB of free space on your computer.
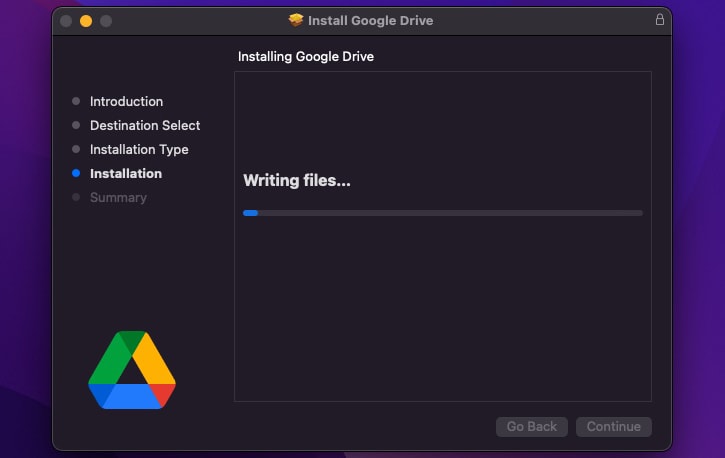
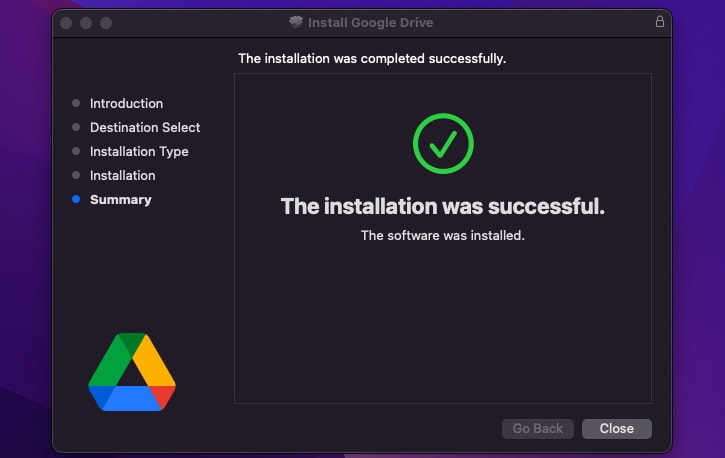
After the installation is completed, Google Drive will open automatically and prompt you to sign into your account. The installer will ask you if you want to move the installation file to the trash, which you will probably choose to do (does anybody save installation files anymore?).
Signing in is pretty straightforward – if you’re already signed into your browser, you don’t need to sign in manually in the app; click sign in, and the app will open up your browser, confirming if you want to use your account on your desktop app. All done – your Mac is now synced with your Google account!
If you’re not already signed into Google in your browser, you’ll have to sign in manually:
- Enter your Google ID in the username/email field.
- Enter your password to sign into the Google Drive installer.
- Note that if you did not create a Google account in step 1, you could create one now.
After signing in, the app will request permissions to access your drives to back up your files and photos. If you don’t want to back up your photos, you can change your settings to limit what Google Drive is backing up to the cloud.
![]() Note: If you plan to keep your Drive files synced with files on your Mac itself, you’ll want to make sure your destination location has enough space for the full 15 GB (or more if you plan to pay for additional storage later.)
Note: If you plan to keep your Drive files synced with files on your Mac itself, you’ll want to make sure your destination location has enough space for the full 15 GB (or more if you plan to pay for additional storage later.)
There are a few other options that you’ll want to check to complete your installation:
Choose whether you want to Stream files or Mirror files. If you want your photos to sync to Google Drive, you will want to ensure your Pictures folder (or another folder if you store your photos elsewhere) is selected. If you wish for Drive to be completely separate from your Mac account, you can uncheck everything, and Drive will be a clean folder for you to use as you desire. We’ll touch more on this section in a bit.
(Optional): Choose photo backup quality. In the past, Google would allow you to back up photos in slightly reduced resolution, and they would not take up space in your Drive. They changed that rule in 2021, and now your choice determines whether you want to store your photos in full quality or reduced quality and size. Your files will count against your storage quota regardless of your choice.
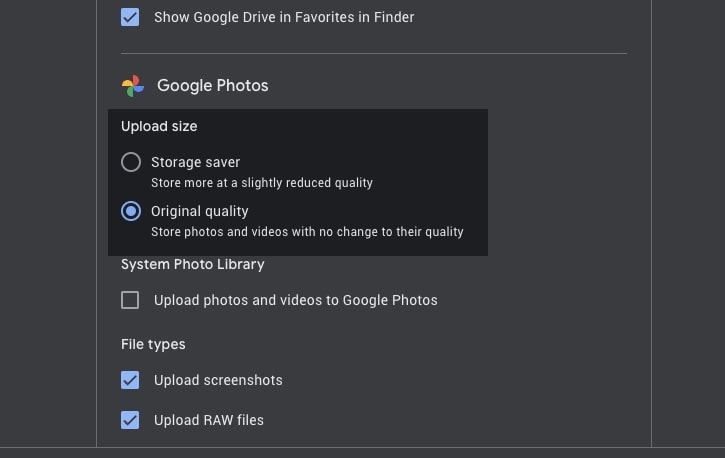
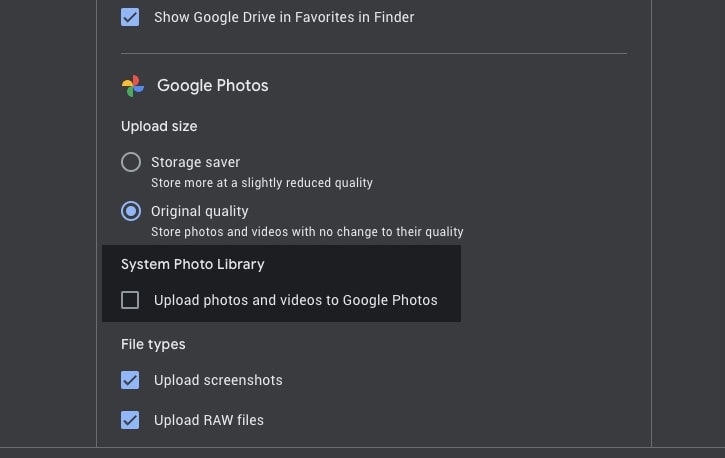
Choose whether or not you want your photos uploaded to Google Photos. Google Photos is a separate app that can sort and manage your photos but still uses your Drive storage space. It’s up to you if you want to use this app, but it’s not necessary to use Google Drive.
Click through the remaining window to sync your files and folders. Wait while Google does so, either downloading files from Drive to your local Mac or uploading files from your Mac to your Google Drive account.
Now you can browse your Drive folders from your Mac and interact with the files on your Drive or access those files from the web interface, a connected iPhone, Android, PC, or another device.
When choosing what files and folders you want to sync with Google Drive, you can select your iCloud folder. This step will ensure that Drive will sync everything you back up to your iCloud with your Google Drive account.
![]() Note: The downside to this option is that (depending on your sync settings) it could take up double the space since everything in iCloud will also take up space in Google Drive. However, if you lost access to your iCloud, you would still have access to those backups in Google Drive and vice versa. It’s up to you whether this is a valuable feature for you or not.
Note: The downside to this option is that (depending on your sync settings) it could take up double the space since everything in iCloud will also take up space in Google Drive. However, if you lost access to your iCloud, you would still have access to those backups in Google Drive and vice versa. It’s up to you whether this is a valuable feature for you or not.
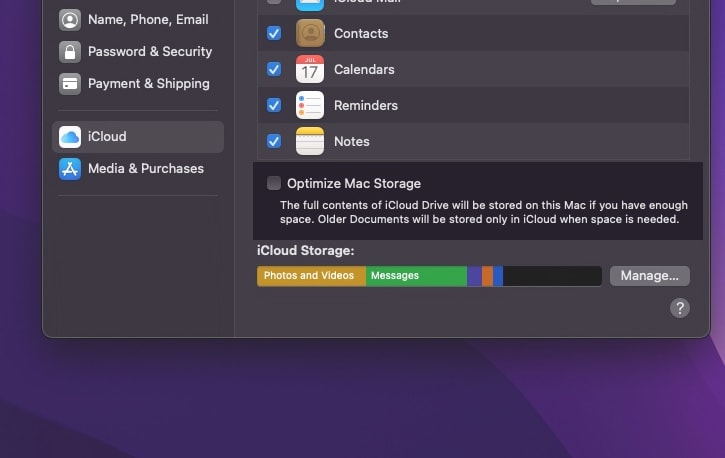
One more note is that iCloud and Google Drive don’t always play nicely together out of the box. iCloud will attempt to optimize your storage automatically and will likely create some temporary system files ending in the .icloud file extension. Typically these files aren’t a big issue, but if you’re noticing that hundreds or even thousands of these are being created (in some cases, we’ve seen hundreds of thousands), you can turn this feature off by unchecking “Optimize Mac Storage” in your iCloud settings.
Open System Preferences, click “Apple ID,” then choose “iCloud” in the left menu. Then, uncheck the “Optimize Mac Storage” option. This change will eliminate the .icloud files and keep them from clogging up your storage.
All of these choices are not permanent. You can, at any time, go into the Google Drive settings and choose to include additional folders, exclude previously-included folders, and change your sync type. Speaking of sync type:
Choose Your Sync Type
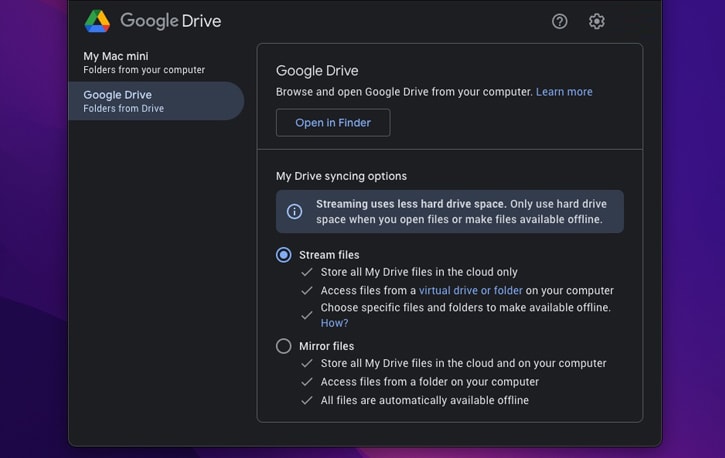
The two options are Mirror Files and Stream Files.
- Mirroring files means that every file in your Google Drive is stored locally on your Mac hard drive as well. You can work on those files locally, and when you connect to the internet, Google will sync the changes you make between your Mac and Drive. This option can take up significantly more space on your Mac hard drive but allows you to work offline and sync changes when you return to an internet connection.
- Streaming files means that the files are stored in the cloud in Google Drive. When you want to access a file, it is “streamed” to your Mac. This option does not eat up hard drive space on your computer.
You can work on it “live” with changes synced to the Drive regularly. This option takes up much less space on your Mac hard drive but requires an active internet connection to access and work on your files.
That said, you can temporarily download a file, work on it without an active internet connection, and later upload the changed version. If you decide to roll with this method, you need to be careful not to overwrite a newer version with an older one if you choose to do this.
Both methods are perfectly viable and helpful, so pick the option that works the best for your needs. You can find this section in your settings by following these steps:
- Click the Drive icon in your navbar (the small icon in the upper right-hand corner of your screen)
- Click the gear icon
- Click “Preferences”
- Click “Google Drive” on the left menu
Mirroring will likely work best if you frequently work during a commute where you have no internet access or travel and work in isolated areas. Streamed files will save you storage space if you only work where you have a stable internet connection.
Step 4: Access Google Drive from Finder
If you’ve been paying attention, now that Google Drive is installed, you may have noticed that it is visible in Finder. It will be in the left-hand column on the same level as other storage volumes, like iCloud or your Mac hard drive.
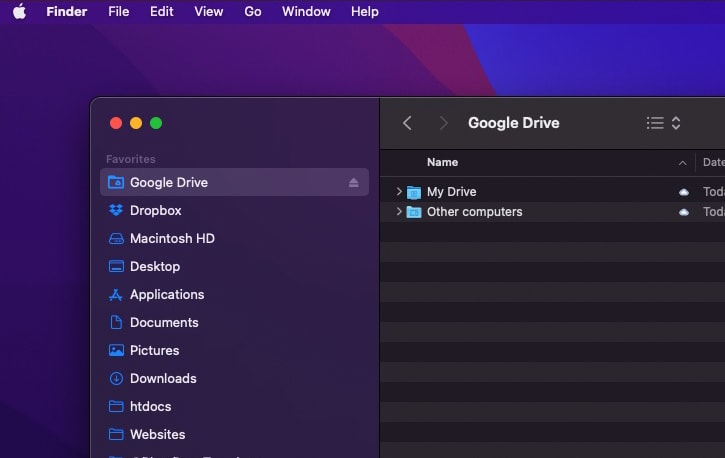
When you click the link in Finder, it will open the top-level Google Drive folder, showing you everything in your Google Drive. This folder may have synced folders and files that you chose to upload, or it may contain what you have used in the web version of Google Drive, or it may be empty.
Regardless, it would help if you treated it like any other storage volume; you can create new folders, move and rename files, and do any other actions you need to use Drive appropriately.
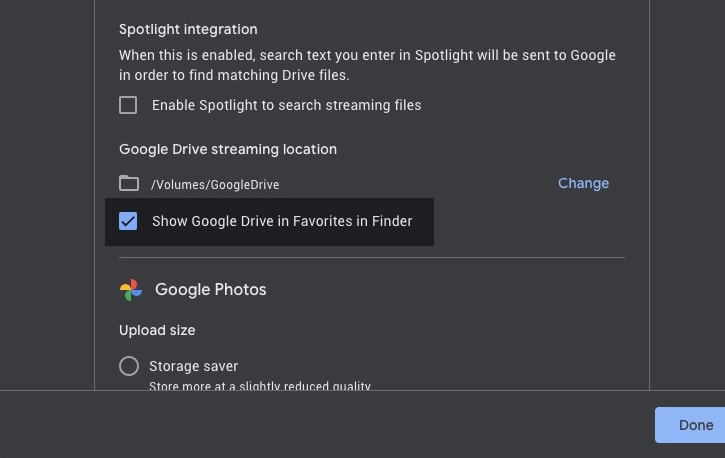
If Drive is not present in Finder, it’s easy to put it there. All you need to do is locate the top-level Google Drive folder, which should be directly under your username in Finder. Drag that Google Drive item to the Finder sidebar wherever you want it to be. If you’re unsure where your Google Drive folder location is, you can always open your Google Drive settings, which will show you. There’s also a handy checkbox that you can check or uncheck to show in your favorites menu in Finder, like in my screenshot.
Note that you may need to click the “show” button to show otherwise-hidden or collapsed folders if Drive is already present but hidden.
Step 5: Use Google Drive
At this point, you are free to use Google Drive as much as you please. Many people treat it as an additional folder to store data and back up critical files, like photos and documents. Others may use it as part of a business.
If you choose to use Google Drive for your business, you may consider converting your account into a Workspace account with Google. This upgrade grants you access to various additional features and potentially much larger storage allocation for a lower price than personal Google Drive rates. However, if all you’re doing is infrequently backing up small individual files and folders, you may not need to go into this.
If you want to change your Google Drive account’s storage limits at any time, you can log into Google on the web and do so. You can do things like sign up for Google One and pay for a higher-tier storage plan.
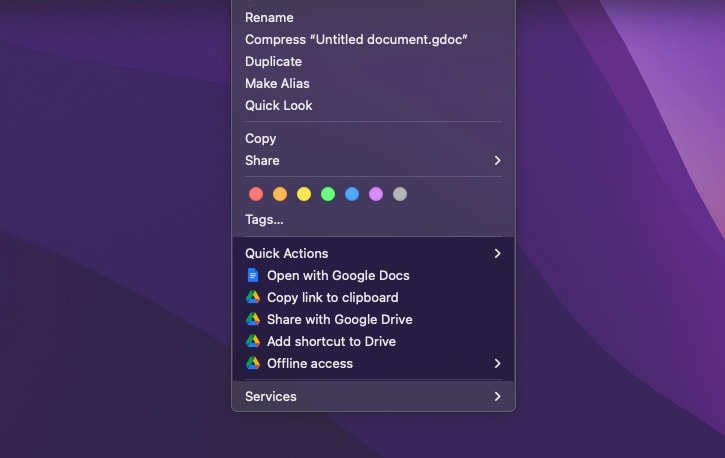
With Google Drive installed on your Mac, you will also see new context menu options when you right-click on a file. You can copy a link to the file, share a file with Google Drive no matter where it is, manage different versions of the file, and even share the file, including choosing whether it will be open to everyone or just to selected people.
If you’ve been using Google Drive for a while, you may have a lot of unused storage space.
While upgrading your plan will give you access to more space, you may want to clean up your existing Drive before resorting to paying for more space. Luckily, we have a detailed guide that includes sixteen methods for cleaning your Google Drive right here.
So there you have it!
This guide is the step-by-step method required to set up Google Drive on your Mac and ensure it is visible in Finder for your use. That said, sometimes Google or Apple will make a change in their system.
If this process no longer works or doesn’t work for you, feel free to leave a comment and let us know! I’d be happy to look into this for you and point you in the right direction.
Related Posts
 Powerful Tool to See Your Google Drive Folder Size
  The Ultimate Guide to Using Google Drive on Your iPhone
  How to Copy ‘Shared With Me’ Files Between Google Drives
  How to Delete Your .DS_Store & ._ Files from Google Drive
  File Size Limits: What is The Max Upload Size on Google Drive?
  Why The Google Drive App is Eating Your Hard Drive Space
6 responses to “The Ultimate Guide to Adding Google Drive to Finder in macOS”
I do not think they have mirroring option unless they just changed it to back up. Maybe you can confirm if backup works the same as mirroring
Hey Matt!
The latest version has a Mirroring option, though it’s buried a bit in the app settings.
Mirroring will back up your files, so any file added on macOS will get uploaded to Google Drive, and vice versa.
Google Drive on my M1 iMac seems to cause it to overheat. Temps will hit 150+. When I shut it down, it will drop to around 100-110. Any thoughts on why that is? I keep quitting it to reduce the temps.
Thanks,
Mark
Hey Mark!
I haven’t had this specific issue yet. Have you checked Activity Monitor to see if Google Drive has high CPU or memory usage?
If you’re mirroring files and uploading/downloading a ton of files for the first time, I could see that using a lot of CPU until it’s completed.
I would check to see how far along your sync is and how it’s affecting your CPU and memory usage.
This would also be a good time to close any other apps that are hogging your resources!
I use two different Google Workspaces, a personal one and a business one. On my Mac, Finder defaults to my personal GWS. Ideally I would like both my GWSs to appear in the Finder Locations list, along with iCloud.
Is this possible and how do I do it?
Similarly the Save as function defaults to my personal GWS.
Thanks!
Peter
Hi Peter!
Yes, you can add multiple Google Drive accounts on MacOS, and they will both appear on Finder.
Click the menu icon, click Preferences, then click your account’s photo in the upper right. Next, click “Add another account”.
I’ve verified that this is working on MacOS so you should have no issues!