
Caching is an essential part of many different kinds of programs and apps. By building and maintaining a cache, your systems can keep data close at hand so it loads quickly and doesn’t need to be downloaded repeatedly.
Web browsers use caches to keep common elements of frequently-used sites locally available, so only the changing content is downloaded when you visit a new page. Many apps download specific segments of the data they access for the same reason and only require a re-download when something changes and needs to be updated.
Google Drive is no different. Google Drive uses caching to store files locally, even if you aren’t using the synced files option, to allow for faster access to your files. It’s a built-in, silent part of Google Drive for Desktop and Google Drive on the web.
In particular, Google Drive uses caching to store files that are in the process of being uploaded.
This functionality serves two purposes. It allows Google to use a consistent location for uploads rather than dealing with user folder paths, and it enables Google to pause and resume uploads if necessary.
Since upload issues are a common problem with Google Drive, having a way to handle problems natively is a good feature.
The Problem with Google Drive Caching
Caching isn’t perfect, and Google Drive’s cache may need to be cleared out occasionally.
Depending on the size of your store space, the amount of data you continually upload, and the size of your organization, this could be as often as once a month. It’s pretty inconvenient, especially since Google doesn’t have an easy, convenient “clear cache” button as many other apps do. In fact, Google barely even acknowledges that Google Drive has a cache at all, as far as their help center documentation is concerned.
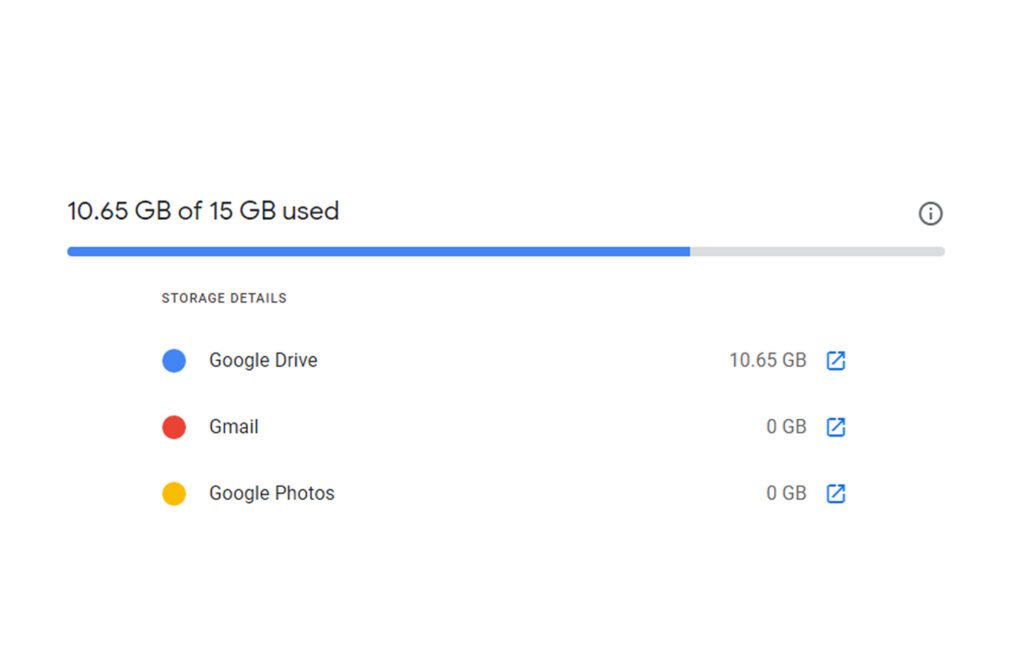
Google Drive caching can be a problem for one primary reason: it can eat up a lot of storage space on the drive where Drive for Desktop is installed or where your web browser’s cache is stored, depending on which version of Google Drive you use.
When you use file streaming from Google Drive, a copy of the file is downloaded locally and stored in the cache for editing and then uploaded when you’re done editing it. The cached files are duplicates of the files you use otherwise.
Files aren’t removed from the cache right away, though. They linger so that when you open them again, it’s faster to open them the second time. Cache files will expire and are deleted eventually, but “eventually” can be a long time. If you have to access many files routinely, your cache files will consume a lot of hard drive space, and you may not need those cache files if you don’t access those files very frequently. Moreover, that hard drive space disappears invisibly; you can’t find the files chewing it up in Google Drive because they’re invisible by default.
This limitation can be very irritating since the entire point of using file streaming rather than syncing is to free up local storage space. The files are stored on the cloud, not your computer. Except they’re on your computer too, sometimes, inconsistently, for variable lengths of time, eating up your precious storage space.
Why You Might Need to Clear Google Drive’s Cache
If you routinely access many different or large files, you will likely want to clear the cache from time to time; this is because it can build up quite a lot of data, which is unnecessary once the files have been uploaded.
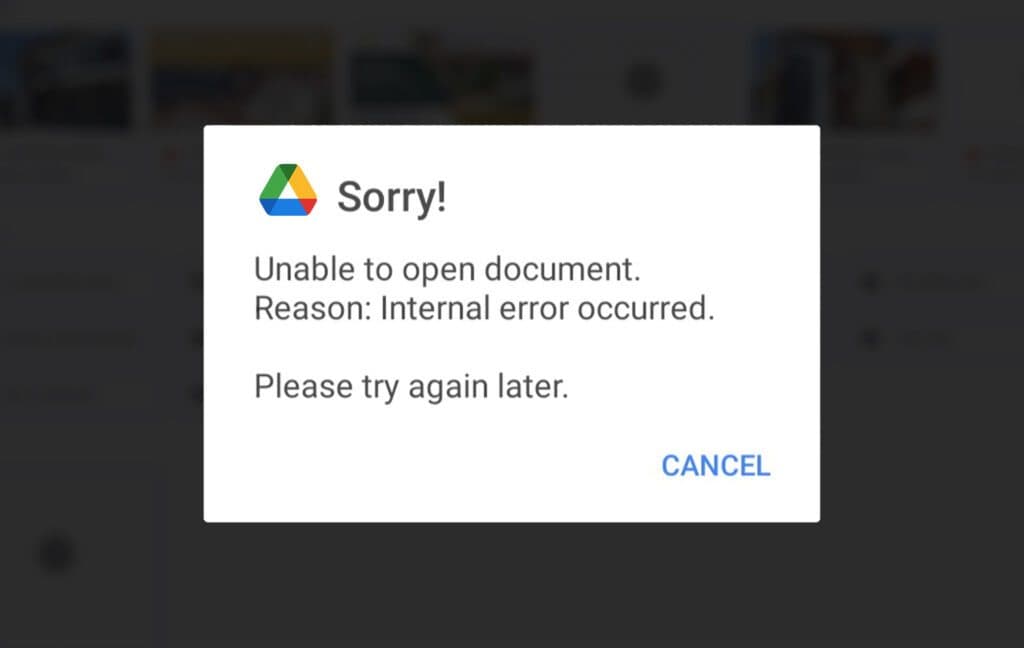
You may also need to clear the cache occasionally if a file issue occurs, a file gets stuck, displays errors on opening or another problem appears. However, you’ll want to be careful with clearing your cache for troubleshooting purposes.
Is Clearing the Google Drive Cache Risky?
A little bit.
As I mentioned above, when you open a file that is stored on Google Drive and doesn’t have a local copy (that is, when you’re using streaming rather than syncing), a copy of that file is downloaded locally. This functionality provides resilience and speed. If Google didn’t download the file, any change you made would need to be live synced with the internet, which not only slows down your editing, it makes you very fragile to interruptions in your internet connection.
When you edit a file and save the changes, the changes are held in the cached version of the file locally first. Then, Google uploads the file to the Google Drive store, where it overwrites whatever older version they have.
If you’re having issues with Google Drive and decide to clear the cache, what happens to a file that was stored in the cache but has yet to be uploaded to the web? It’s lost. Any changes you made or editing you performed will be lost because the modifications temporarily stored in your cache weren’t uploaded and synced.
If you work offline by opening files while online, then upload your changes when you return to an internet connection, this can put a lot of data at risk. Be very cautious if you want to clear your cache, and ensure any recent changes have correctly synced before you purge those files.
How to check if files have synced properly.
Sadly, it can be difficult to tell if a file has synced correctly. The best option is to try to access the file from another device and see if your changes are visible.
You can also check Google Drive’s icons to see if it labels a file as synced and what the last edit time and date were. It’s possible that Google still needs to update that information in your dashboard, but these stats are generally reliable enough once a file has synced successfully.
How to Clear Google Drive’s Cache
If you’re hoping that Google Drive has a nice, simple “clear cache” button in its settings, unfortunately, you’re out of luck. They have that button, but only in the mobile versions of Google Drive.
Each method of accessing Google Drive has unique steps to clear the cache; some of these steps are more accessible than others.
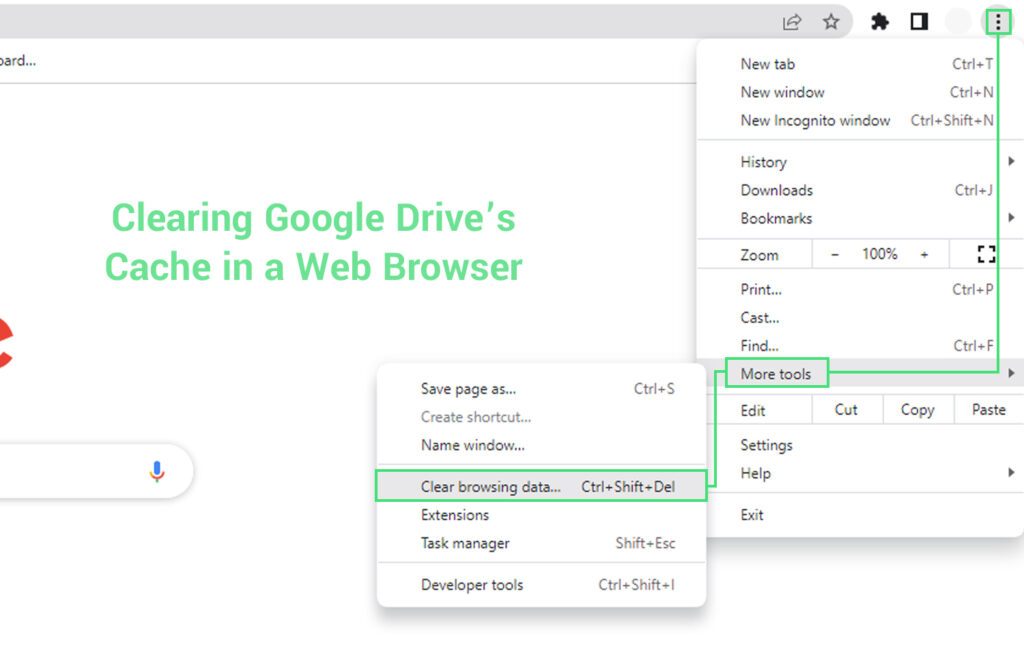
Clearing Google Drive’s Cache in a Web Browser
If you’re using Google Drive on the web, your cache is not a separate Google Drive cache.
Instead, it will be the full cache for the web that your browser keeps on hand.
![]() Note: Before you purge this cache, know that it won’t just delete Google Drive cached files but also anything a website has stored in the cache as well; this means any websites you visit will need to download their content again, which is usually just a matter of a few hundred milliseconds but can be longer for poorly optimized sites. It generally won’t log you out of sites or change your default settings – these are stored in cookies instead of the cache – but it might reset script settings.
Note: Before you purge this cache, know that it won’t just delete Google Drive cached files but also anything a website has stored in the cache as well; this means any websites you visit will need to download their content again, which is usually just a matter of a few hundred milliseconds but can be longer for poorly optimized sites. It generally won’t log you out of sites or change your default settings – these are stored in cookies instead of the cache – but it might reset script settings.
Clearing your browser cache is generally the same process no matter what web browser you’re using, but different browsers may name the settings differently.
Here are a few examples:
Google Chrome
- In Google Chrome, click the three dots button for settings. Hover over “More Tools” and choose “clear browsing data.”
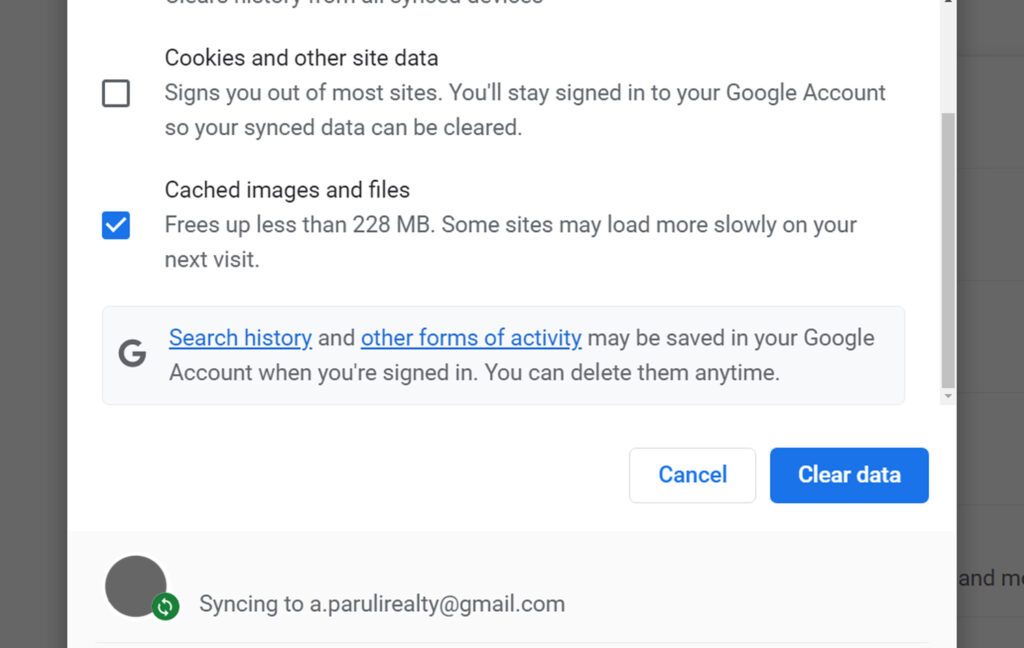
- Clicking this gives you an options box, allowing you to choose what to clear and what timeframe to clear it from. Choose “all time” and “cached images and files,” and click Clear Data to finish clearing it out.
Mozilla Firefox
- In Mozilla Firefox, click the burger menu icon in the corner.
- Choose History, then Clear Recent History. Make sure to check the Cache option, set the time range to “everything,” and click OK to clear the cache.
- Note that this will also clear out your history of visited websites, so make sure to bookmark anything you want to save.
Microsoft Edge
- In Microsoft Edge, click the three dots button for settings.
- Click History. In this menu, click the three dots again, and choose “clear browsing data.”
- Set the time range to all time, choose to clear images and files, and click Clear Now to finish clearing the cache.
Other browsers, like Opera and Safari, will have similar instructions.
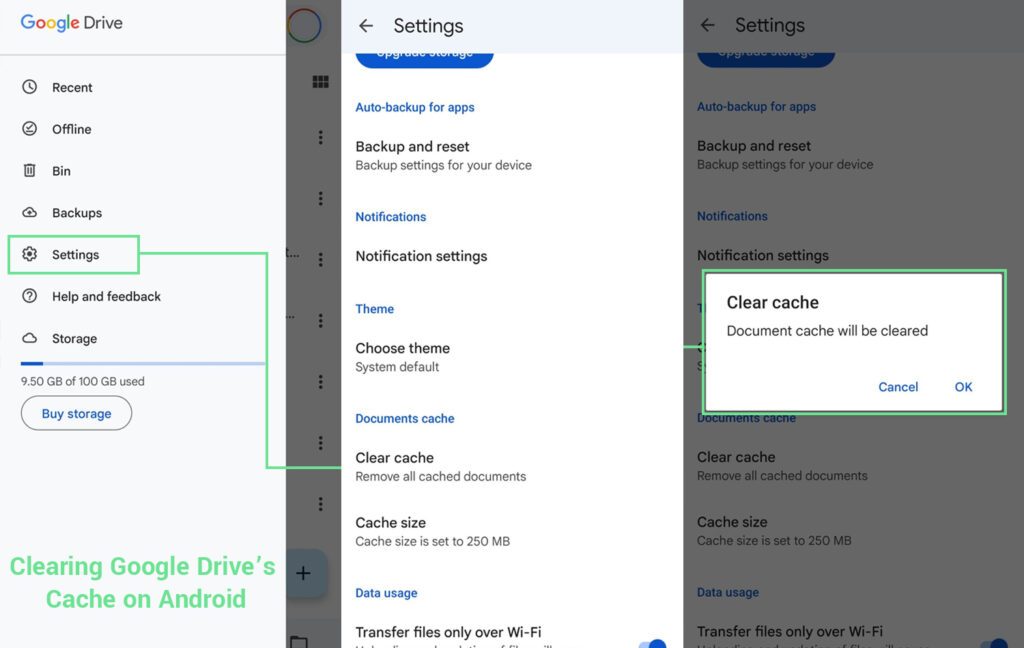
Clearing Google Drive’s Cache on Android
Android has Google Drive as a native app. Luckily, this is one of the few platforms where clearing the cache is a standard feature rather than something you have to jump through hoops to do.
Here’s how to do it.
- Open the Google Drive app on your phone and, if necessary, log into an account.
- Tap the burger menu button and choose Settings.
- Scroll down until you find the Clear Cache option, and tap it.
- Confirm that you want to clear the cache.
You can also choose to set the maximum size of the cache for your phone or tablet. Be careful about setting it too low, though; this can make the app unstable, prone to slow performance or a crash, and can prevent you from opening files larger than the cache.
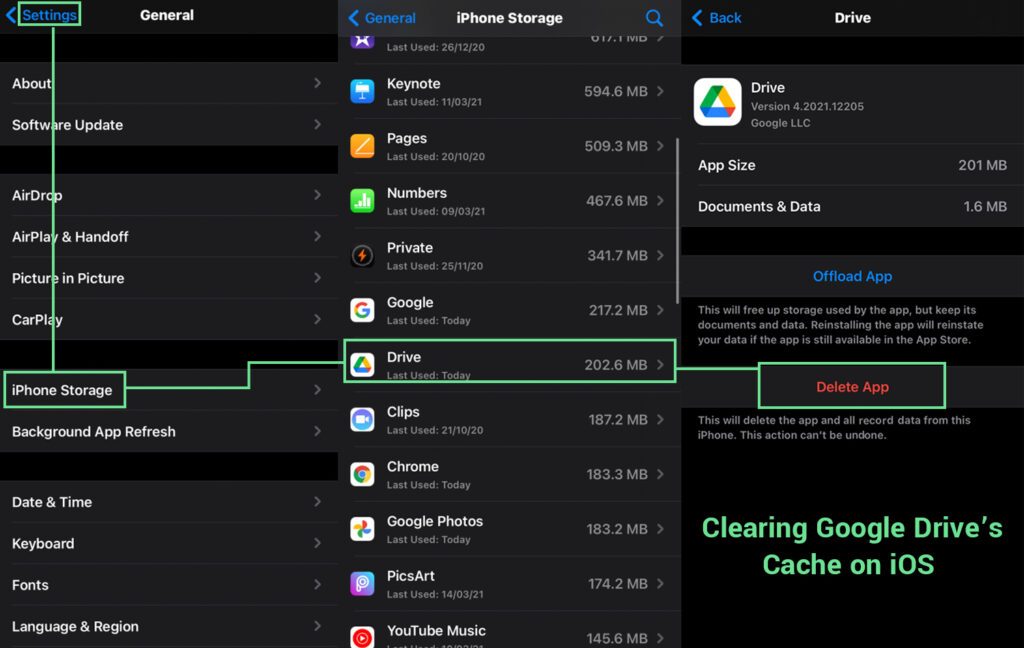
Clearing Google Drive’s Cache on iOS
There are two ways to remove your cache on an iOS device. The first is preferable but may not be available.
Option 1: Open the settings app on your device. Scroll through the settings until you find the Google Drive app. Select the app and scroll through the available settings.
Depending on your iOS and app version, you may see one option called “Reset cache on next start.” You might also see “Clear Temp Data on next start.” Choosing both of these will clear your cache. They will set a flag that purges the app’s cache when you next launch Google Drive on your iOS device. Then, launch Google Drive to clear the cache.
![]() Note: Unfortunately, this option doesn’t always exist, and many users report that Google Drive doesn’t provide the opportunity.
Note: Unfortunately, this option doesn’t always exist, and many users report that Google Drive doesn’t provide the opportunity.
In that case, you have to go with the following:
Option 2: Delete the app and reinstall it.
This option clears your cache but requires you to reconfigure your installation, sign in again, and set up any other associations you had with the previous installation. It’s inconvenient, but it’s your only option if your cache has problems on an iOS device and the settings menu doesn’t allow a simple clear.
Clearing Google Drive for Desktop’s Cache
Unfortunately, the platform you would most likely expect to have an easy option doesn’t have it.
Windows devices and Macs that use Google Drive for Desktop have two choices: they can dig into invisible temporary files and delete them or delete and reinstall the program.
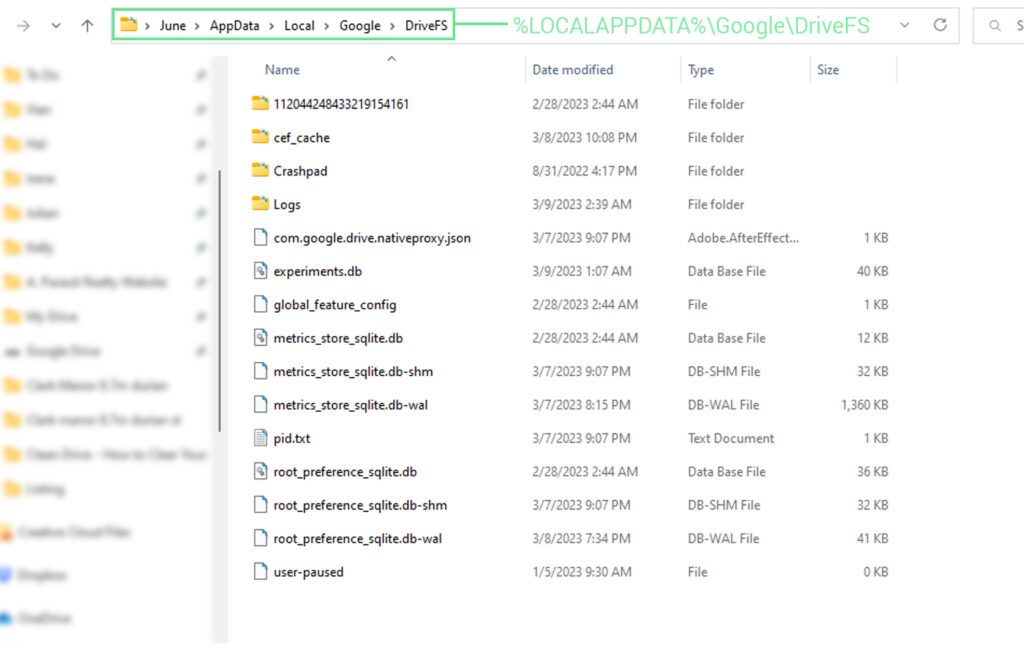
The cache is located in this location (unless you’ve customized it):
- Windows: %LOCALAPPDATA%\Google\DriveFS
- Mac: ~/Library/Application Support/Google/DriveFS
Deleting these folders as a whole will purge your cache and a bunch of other little settings files and configuration options that Google will need to rebuild. You may also need to make sure you have administrator rights to even access these folders or delete the files.
As mentioned above, be careful with deleting the cache here. You can lose data if it hasn’t synced before you delete it.
You can also set a max size for the cache, at least in Windows, by setting a registry key.
Registry editing is an advanced feature that can cause a lot of problems if you do it wrong, though, so only do so if you know what you’re doing.
Specifically, you want to find the registry key “Computer/HKEY_LOCAL_MACHINE\SOFTWARE\Google\DriveFS” and give it a maximum size by editing the ContentCacheMaxKbytes decimal value.
Saving Space in Other Ways
While clearing your cache can temporarily free up a bit of space on your local computer, there are other ways to manage space in Google Drive.
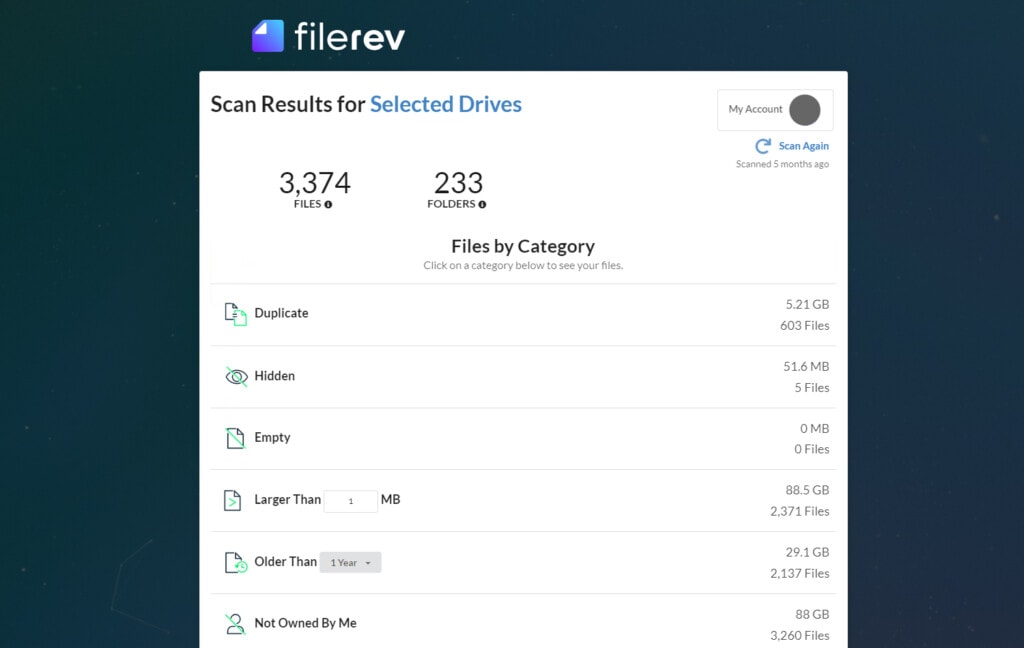
The one I always recommend is Filerev. Filerev will scan and audit all of the data stored on your Google Drive account, including hidden and app data. You can then sort through it and do things like delete older, unused files, delete the largest files, and clear app data from apps you no longer use.
All of this helps cut down on the amount of data Google stores and, thus, the amount of data that can end up in your cache. Why not give it a try?
Related Posts
 Why The Google Drive App is Eating Your Hard Drive Space
  Powerful Tool to See Your Google Drive Folder Size
  File Size Limits: What is The Max Upload Size on Google Drive?
  How to Copy ‘Shared With Me’ Files Between Google Drives
  Differences Between Google Drive Web and Desktop Versions
  The Ultimate Guide to Using Google Drive on Your iPhone
Leave a Reply