
Google Drive is an excellent application for storing, transferring, and managing files in both a personal and a business setting. However, it’s not always immediately clear how to perform various tasks you believe you should be able to do. Sometimes, the functionality exists but is named strangely or hidden in menus. Other times, something you think should exist isn’t there, leaving you looking for third-party solutions. And, of course, sometimes you might overlook a straightforward option. It’s okay; it happens to all of us.
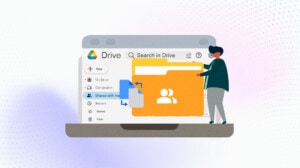
One standard function you’ll likely want from Google Drive is the ability to move files from one Google Drive to another. There are many reasons why you might want to do this.
- You have a drive for active use files and another for archival; you want to zip and archive files that aren’t frequently used and move the archived files to the storage drive.
- You and a coworker each have your Drive accounts, and you want to move files back and forth (rather than collaborate on one shared file), or you need to transfer files from your ownership to theirs.
- You have files in a Work or School drive, and you want copies to use to work on them at home, so you want to get a copy for your own use.
- You have more than one Drive account, and you want to consolidate them, so everything on one Drive needs to be moved to another, and the first Drive closed down.
- You have multiple Google Drive accounts to increase your total storage capacity, and you want a better way to move files around between them.
- You have files in a personal Google Drive account, but you want to move them to a shared drive so your account isn’t the owner and every participant can manage those files.
So, let’s dig into some of the various ways that you can transfer files between your Drives.
![]() Note: You may also find it interesting to know that Google technically doesn’t have a limit on how many accounts you can have. While I wouldn’t necessarily push them on that one, it’s still helpful to know that you’re not violating their terms of service by owning multiple accounts or transferring between them.
Note: You may also find it interesting to know that Google technically doesn’t have a limit on how many accounts you can have. While I wouldn’t necessarily push them on that one, it’s still helpful to know that you’re not violating their terms of service by owning multiple accounts or transferring between them.
Before You Begin: Clean Your Drive
Before you decide to move files around, one thing to consider is whether or not you need to, and a second thing to consider is whether or not there’s enough space to move your files. Google Drive only has a limited amount of storage space available to a Google Account, and while you can get more in various ways, it’s still possible to run out. This situation is common when transferring or merging entire Drives.
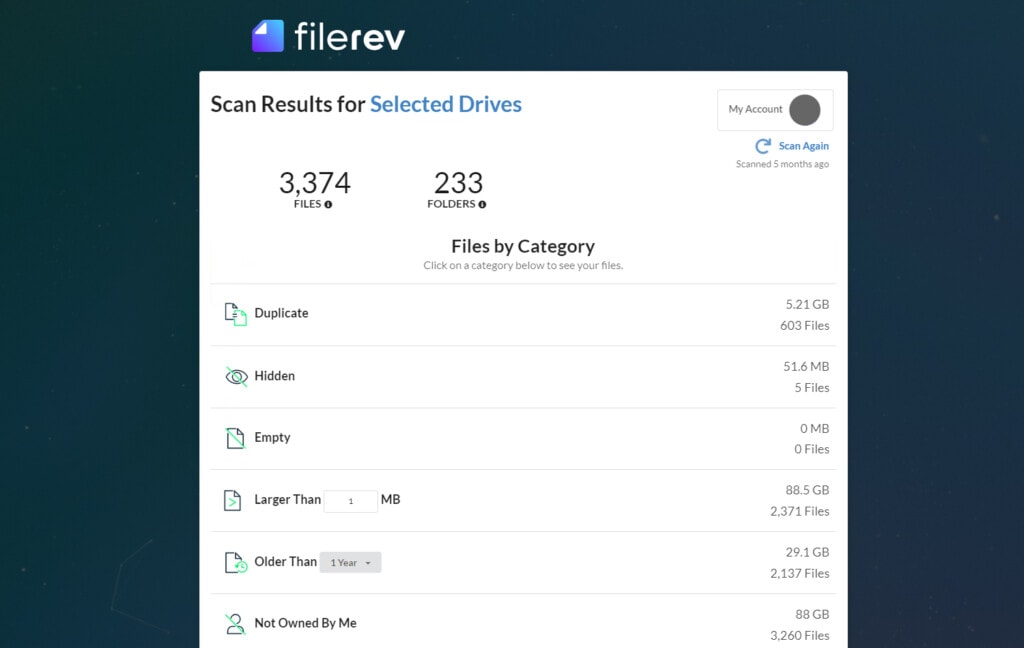
![]() We recommend using an app like Filerev to help you with this cleaning process. Filerev can audit and categorize all of the files on your Drive.
We recommend using an app like Filerev to help you with this cleaning process. Filerev can audit and categorize all of the files on your Drive.
You can see things like:
- Duplicate files.
- Hidden files.
- Temporary files that can be deleted.
- The largest files in your Drive.
- Bulk Delete all files or files in any category.
From there, you can decide how to handle them. It’s entirely possible that, at some point, you’ve ended up with multiple redundant copies of large files and could clear up a bunch of extra space by getting rid of duplicates. You can also use Filerev to help clear out temporary files that waste space and isn’t otherwise valuable. It’s easy and free to use, so click here to see how it can help you.
Once your duplicate and junk files are removed, there are a few different ways you can go about moving files from one Drive to another.
Bear in mind, as well, that how these work will depend somewhat on whether you need to make copies of files or move files from one location to another (without keeping the original file in place). Let’s go through them.
Option 1: Download and Upload
The first option to handle moving files from one Drive to another is probably the most obvious. You’ve likely either already thought of it or are currently using this method and want to find an alternative solution. Nevertheless, if you don’t have many files to transfer and it’s a viable solution for some of you, here’s how to do it.
![]() Note: If you use Google Drive for PC or macOS and choose to mirror files locally, your files will already be on your local Drive, and you can skip the download step.
Note: If you use Google Drive for PC or macOS and choose to mirror files locally, your files will already be on your local Drive, and you can skip the download step.
First, you will need to log into the Source Drive to download your files. This account is the Drive that currently has the files you want to move. Find the files and folders you want to move, right-click on them, and download them to your computer.
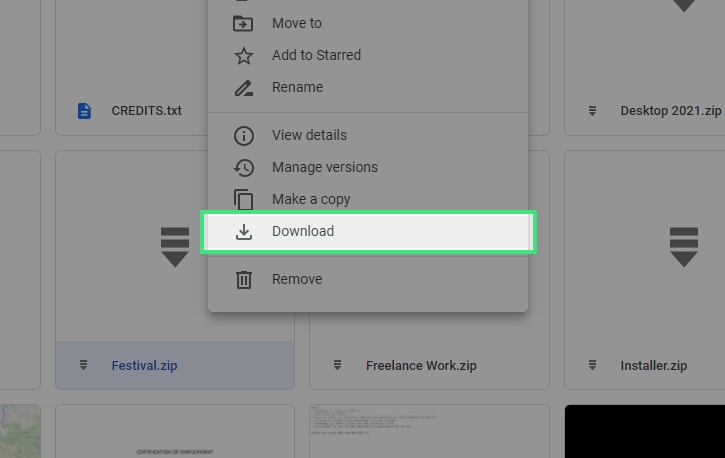
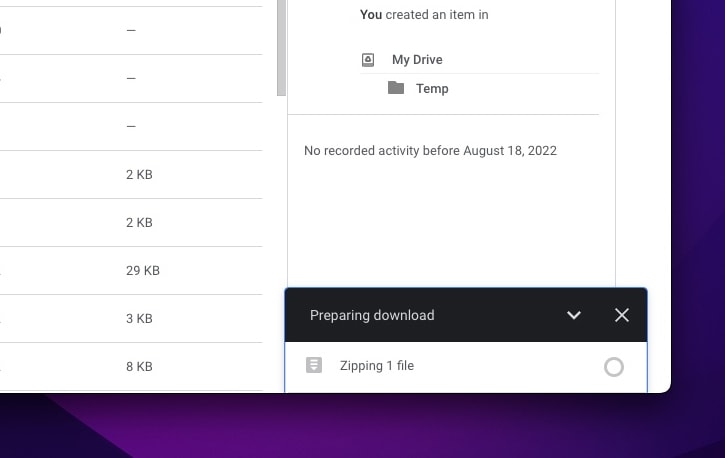
You will need to make sure you have enough space on your computer to do so. Google will also automatically zip folders and might download large files in multiple parts to speed up and streamline this process. There’s no way to bypass the automatic zipping process unless you download files one by one, which isn’t realistic for larger Drives.
If you have a large number of files that you’d like to download, you can instead use Google Takeout. Deselect everything except for Google Drive, choose your compression, choose which files you want to download, and create the export.
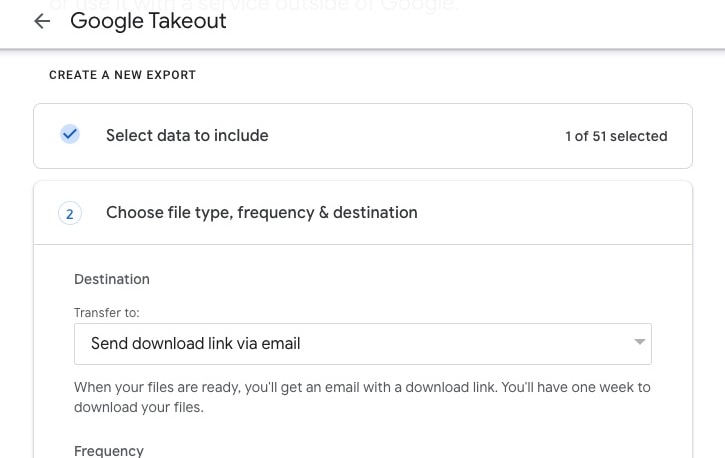
Your files will be emailed to you in a download link once completed.
Once you have your files downloaded, you need to log out of your Source Drive and into your Destination Drive, where you want to put the files. You can do this via the web interface or the Google Drive app by logging out and logging in as a different user.
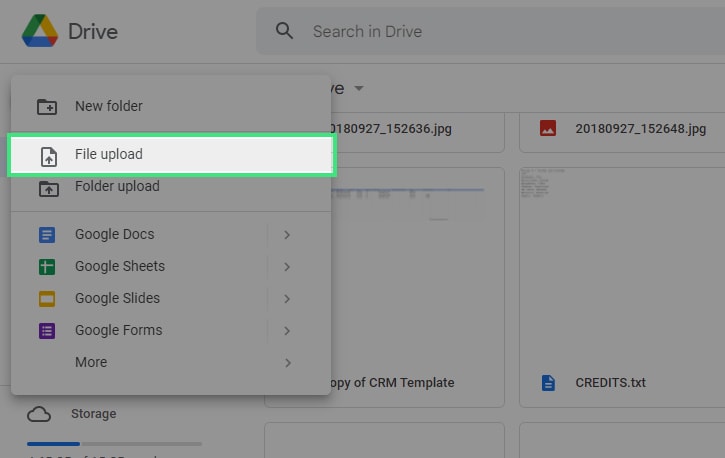
Once logged into the destination drive, you can upload the files and folders. Unfortunately, if the files and folders are zip files, you will need to extract them before uploading.
As you can see, this is a tedious, manual, and time-consuming task. You have to repeat it any time you want to move a file. You need to have enough space to have a local copy of the file you’re moving, and then delete it from the Source drive (if necessary) and your local computer to complete the transfer. You are also limited by the internet connection speeds available for both downloading and uploading, which, depending on the circumstances, may be very slow.
Is there a better way?
The second option makes use of Google’s ability to share and transfer ownership of files between Google accounts.
Typically, the files in your Google Drive are only accessible to the owner of the Drive and any users added to the drive account (in the case of business accounts). However, you can share files with other users or people who don’t even have a Google account.
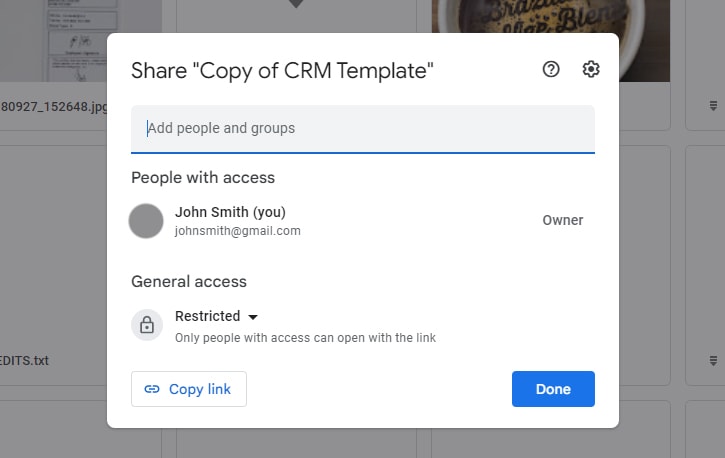
To do this, you choose the files you want to share, right-click them, and click Share. This function brings up the sharing menu, which allows you to specify how and to whom you wish to have the files shared. You can get a shareable link and let anyone who has the link access the file, or you can choose specific Google accounts to add to the access list for the file.
One nice thing about Google Drive is that when a file is shared with you, you can access it, but it does not take up space in your Drive. However, if the file owner moves or removes it, you can no longer access it.
How can you solve this problem? You have two options.
- Make a Copy. When a file has been shared with you, you can select the file, click the File drop-down, and click Make a Copy. This function will create a copy of the file on your Drive, independent of the original. If the original is changed, your files will not change.
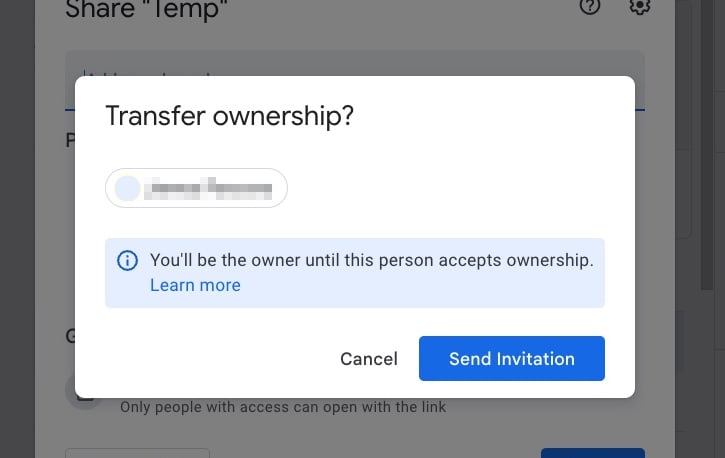
- Transfer Ownership. The owner of the original file must do this. You can choose the “Make Owner” option in the same sharing menu. This function will send a request to the target Drive account, which they will have to accept to transfer ownership of the file.
This, essentially, reverses the roles.
The original owner will now only have sharing access to the file and will not have that file taking up space in their Drive; conversely, the new owner will now have access and control over the file.
The “make a copy” method is effective, except it can run into a problem where the original and the copy are maintained independently. The disconnect between the two files can cause problems if they need to be synced.
Conversely, the “transfer ownership” option has a few minor problems:
- For one thing, it can only transfer a file or a folder one at a time.
- If you have a lot of files or folders you need to move, it will be tedious and require quite a few requests.
- Additionally, it’s a request; it must be accepted to transfer ownership of the file, and that request has a time-out if it lingers too long.
Finally, neither option works if the destination drive is a work or school account. The accounts involved must be admin accounts or personal accounts.
Option 3: Sync Multiple Drives
One more option is available to move files from one Drive to another. However, it has many of the same limitations as the download and upload method in option one. Specifically, you need to have enough space on your computer to hold the files.
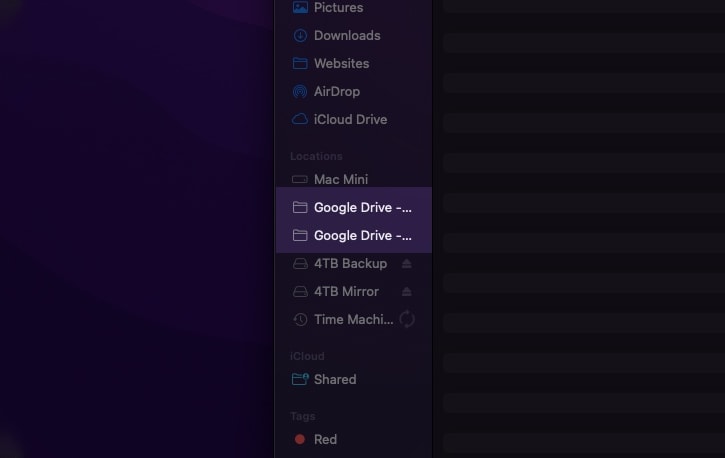
To do this, you need to install Google Drive on your computer. Visit the Google Drive download page, download the setup file, and follow the instructions. For example, here’s how to do it on Finder for MacOS.

One important decision you’ll want to make is whether you want to stream or mirror files.
Streaming files keeps the files on Drive, only downloading enough of a file when you need to edit it and uploading the changes when you save them. This option saves on local space but requires an internet connection to use.

Mirroring or syncing files keeps both a local and an online copy so that you can work offline, and when your internet connection is restored, the newest file will replace the older file.
![]() Note: If you choose to mirror/sync files, you will need enough space on your computer for both Google Drive accounts. Downloading your files isn’t a big deal for personal accounts with a cap of 15GB of storage, but if you’re talking about business accounts with terabytes of storage, it can be a tall order.
Note: If you choose to mirror/sync files, you will need enough space on your computer for both Google Drive accounts. Downloading your files isn’t a big deal for personal accounts with a cap of 15GB of storage, but if you’re talking about business accounts with terabytes of storage, it can be a tall order.
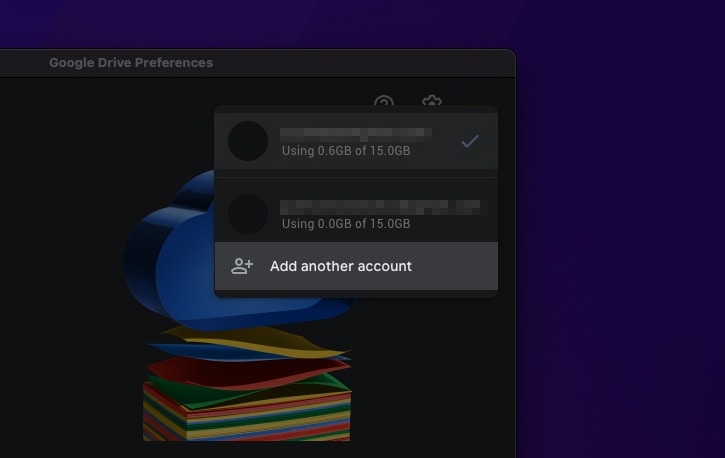
Once you have installed Google Drive, Google will ask you to sign into your Drive account. Do so, and follow the prompts. Once you’re done, you can now add a second Drive account. Google will then redirect you to their login page to sign into the second account.
Once you have both accounts configured in your local Drive, you can move files from one to the other as if they are folders or drives on your computer. If you’re using streamed files, it will need to download and upload the file, but it will at least do so automatically. If you’re using synced files, it will simply move the local copy of the file, deleting the file from the source drive and adding it to the destination drive when you next sync your files.
If you wish to have copies rather than a complete move, you can do that as well, simply by copying the files rather than moving them or by not deleting the source file after you create the destination file.
Option 4: Third-Party Software
Numerous third-party apps on the market allow you to manage and manipulate multiple Google Drives. Some are Drive-centric, while others are meant to enable you to use files across various types of cloud storage, including Dropbox, OneDrive, and custom FTP file shares.
![]() Note: You should use third-party software if this isn’t a one-time transfer. Manually exporting your account every week or every few days is a giant pain, and software can automate that. You can also schedule transfers to push your files automatically at a custom interval.
Note: You should use third-party software if this isn’t a one-time transfer. Manually exporting your account every week or every few days is a giant pain, and software can automate that. You can also schedule transfers to push your files automatically at a custom interval.
The downside to these systems is that they often cost money to manage specific volumes of data. If this is a business expense, it’s relatively minor to save some time, and they’re usually about $10 per month.
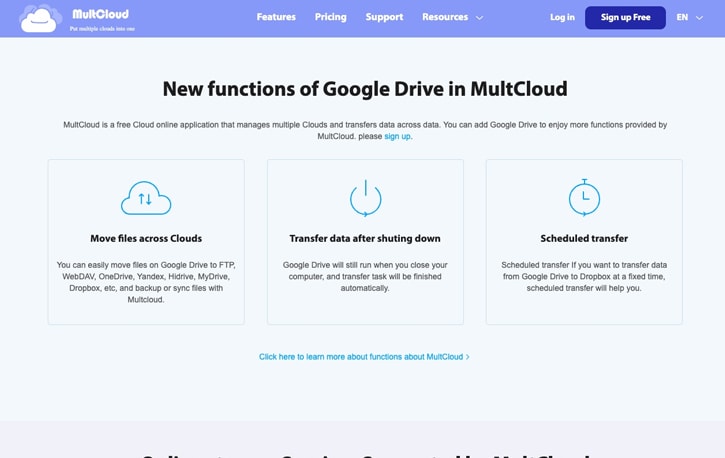
If you want to explore some apps that can accomplish this, MultCloud, CBackup, and InClowdz are all possible options. If you do, let us know how they worked out for you!
Option 5: Workspace and Education Account Transfers
If you’re a Workspace administrator, you can transfer ownership from one user to another, effectively copying those files to their account. This method is ideal if an employee leaves your company or a team member is promoted to a new position, and you need to assign their files to their replacement.
To transfer ownership in a Workspace admin account:
- Sign into your Admin console.
- Click Menu, Apps, Google Workspace, then “Drive and Docs.”
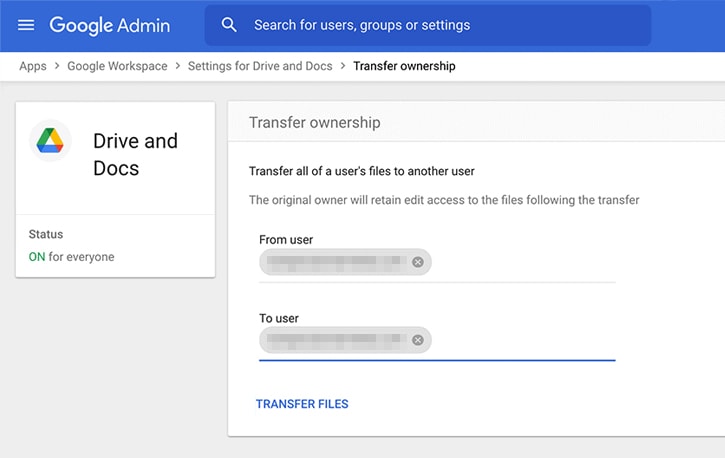
- Select “Transfer Ownership.”
- Under “From user,” type in the current member’s email address. Under “To user,” type in the email address of the account you’d like to transfer these files to.
- Once everything looks correct, click “Transfer files.” All users will receive an email informing them that the process is completed, and the new owner will see a transfer folder in their My Drive.
If you have an Education account, you can also transfer your files to your personal Google Drive account using Google Takeout:
- Visit Google Takeout.
- Enter your destination account (this is your personal Google Drive account).
- Check your email for your confirmation code.
- Copy the confirmation code and paste it into the Google Takeout transfer tab.
- Select the data that you’d like to transfer. For example, you can move your emails, copy your Google Drive files, or both.
- Click “Start Transfer.” You’ll receive an email notification once the process is completed.
Do you have another option that we haven’t covered? If so, feel free to let us know in the comments. It’s entirely possible that (since we wrote this post) Google has added additional features to make it easier to transfer between accounts or made one of these methods inaccessible. Likewise, if you have any other questions about managing your Drive accounts, let us know! We’re always happy to help, and your questions help us help you out.
Related Posts
 How to Copy ‘Shared With Me’ Files Between Google Drives
  Powerful Tool to See Your Google Drive Folder Size
 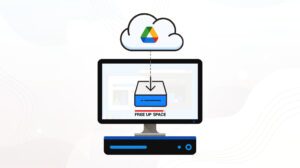 Why The Google Drive App is Eating Your Hard Drive Space
  File Size Limits: What is The Max Upload Size on Google Drive?
  [Guide] Is It Possible to Get Unlimited Storage on Google Drive?
  14 of The Best Google Chrome Extensions for Google Drive
Leave a Reply